Video playback
Tator features an advanced video player that facilitates rapid video review and annotation. Below are some of its features:
- Frame-accurate, which means that if you seek to a given frame number that frame is always what will be displayed. This allows us to overlay annotations accurately down to the frame.
- Real-time annotation display during playback for applications such as multi-object tracking.
- Rate controls for both forward and reverse playback at speeds up to 32X.
- Frame scrubbing for quick looks at frames at an arbitrary rate.
- Multi-resolution streaming to support low-bandwidth connections and faster data loading.
- High resolution on pause, displaying the highest resolution when it is time to annotate even if you got there by streaming at a lower resolution.
- Multi-stream playback, allowing viewing of multiple videos at once (this topic is covered in a separate tutorial).
- Leverages hardware acceleration when available, ensuring smooth playback while other applications are running.
This tutorial will show you the basics of video playback in Tator using a single stream video with default playback configuration. To begin the tutorial, you must have installed Tator, created a project, and uploaded a video.
Below is a video showing the steps outlined in this tutorial.
Open the annotation view
Once you have uploaded a video, you can enter the annotation view by clicking on the media card corresponding to the media in the project detail view. Below is a diagram showing video playback controls.
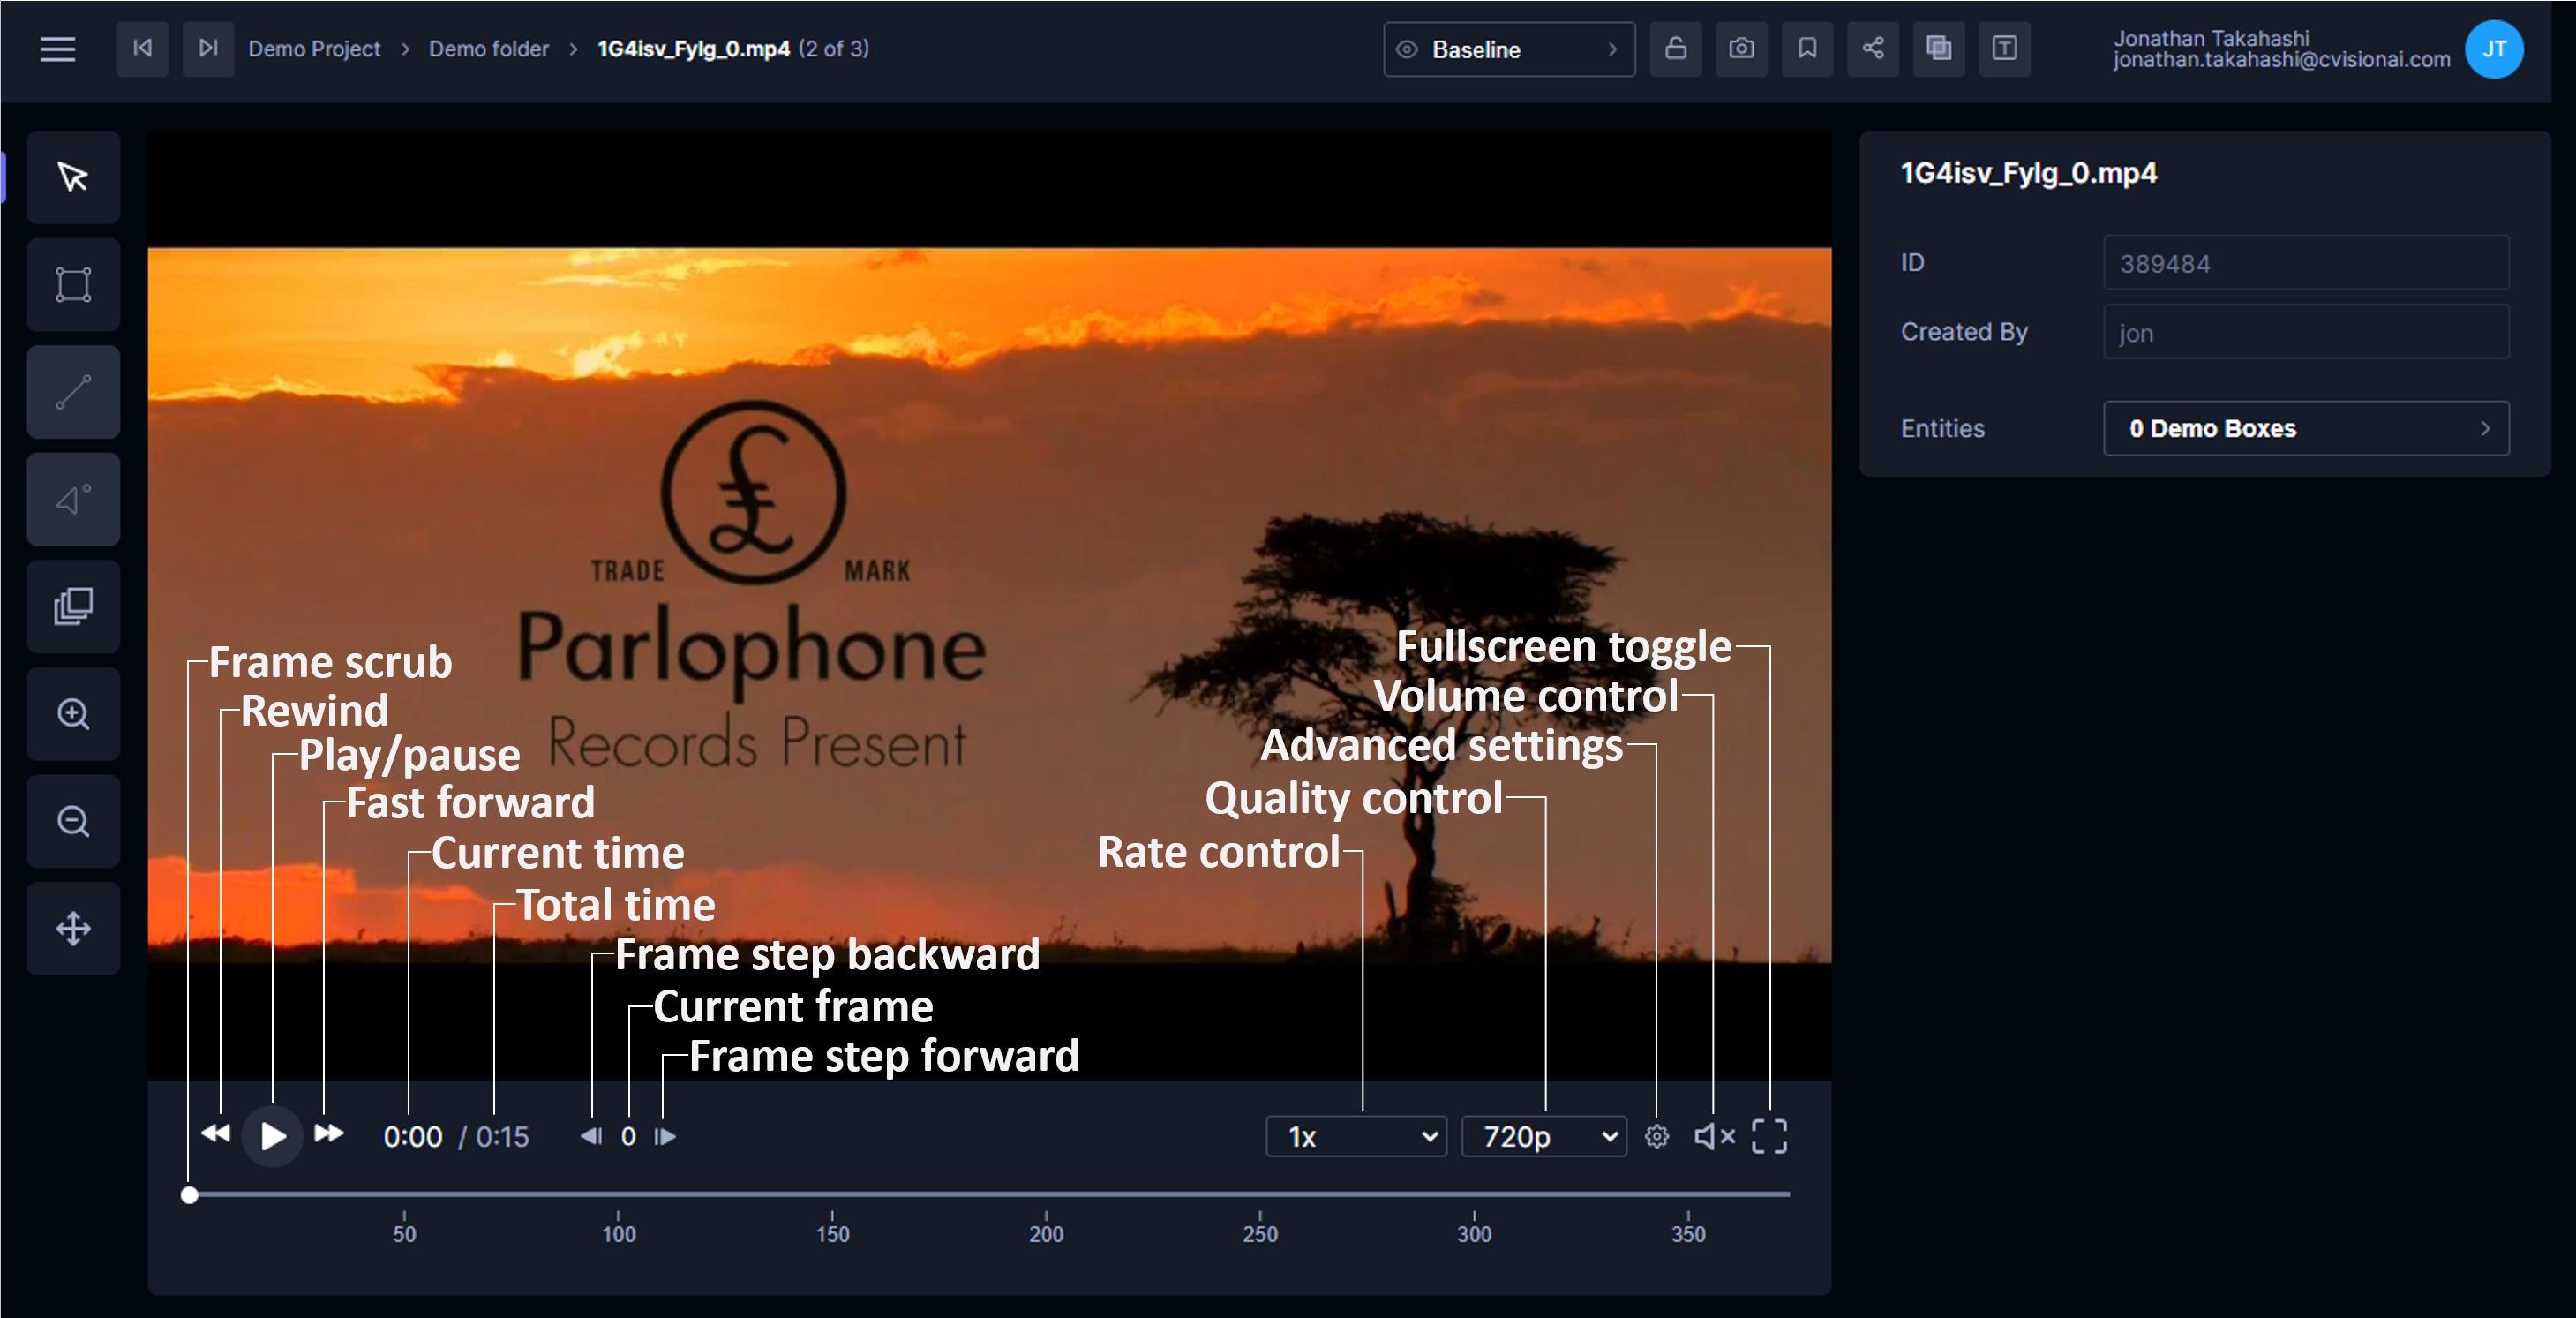
Scrub frames
Click and drag the control labeled Frame scrub along the timeline. You will see the video rapidly update depending on where the control is dragged on the timeline. Frame scrubbing is useful for a quick review of the video. Note that the current time and current frame update depending on the position of the frame scrub control.
Play, rewind, and fast forward
Click the Play button, then click the same button to pause (the icon will change). Try rewinding the video by clicking Rewind, then click Pause again to stop it. Click Fast forward to play the video at 2x the currently selected rate. Click Pause to stop it.
Step through frames
Click the Frame step backward and Frame step forward buttons for single frame increment/decrement. The player is frame-accurate, meaning if you can seek to a specific frame that is what will always be displayed. Most web video players are not frame-accurate.
Change playback rate
Select a different video rate using the Rate control and repeat the steps for play, rewind, and fast forward. Rates correspond to multipliers by the normal playback speed (1x), so <1x corresponds to slow motion, >1x corresponds to fast forward.
Change quality
Use the Quality control to select the lowest quality resolution available while paused, typically 144p. While paused, the highest quality will always be displayed. Press play to verify that the resolution streamed is lower when playing. This is a good way to save on bandwidth for slow internet connections while still benefiting from the highest resolution when annotating.
Change volume
The Volume control is only displayed for videos with an audio stream. Click the Volume control and select a volume level. The default volume can be controlled on a project by project basis using project settings; if not set the volume level defaults to 0 (mute). Make sure the Rate control is set between 1x-4x. Audio is only played for this range of rates. Play then pause the video.
Toggle full screen
Click the Fullscreen toggle to maximize the video and controls. This is equivalent to pressing F11 in your browser.