Organize media with folders
Updated with nested folders in Tator 1.3.
With folders, Tator provides full hierarchical directory structure for organizing media. Like a filesystem, a single media can only be contained by one folder, but it can also be at the "root" of the project, having no folder. This tutorial will walk you through how to create folders and subfolders, how to upload to folders, how to delete a folder without deleting the media it contains, and how to delete a folder as well as the media it contains. It will also cover how to hide and restore folders for media that is not commonly needed.
View media without folders
By default when you open a project, the All Media section is selected. This displays every media object in the project, regardless if it is in a folder. You can always get back to this view by clicking the All Media button:

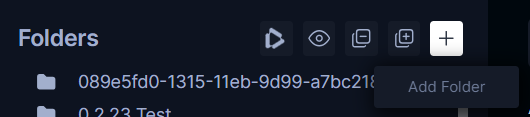
Create a folder
You can create a folder by clicking on the + Add folder button.
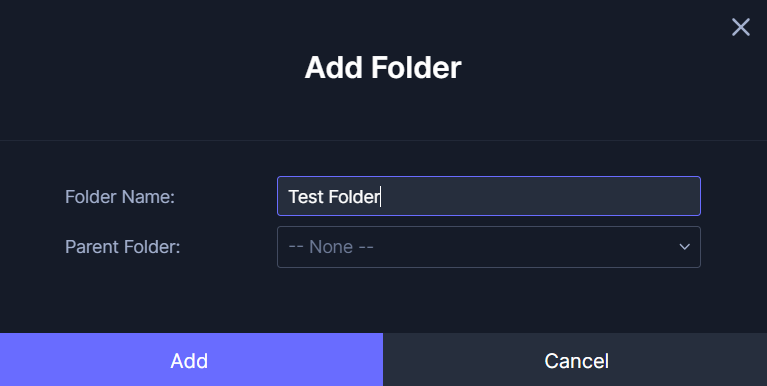
This will bring up a modal dialog prompting you to enter the name of the folder, as well as the parent folder if other folders already exist. Enter the name of the folder, select -- None -- to specify no parent, and click Add.
Upload media to a folder
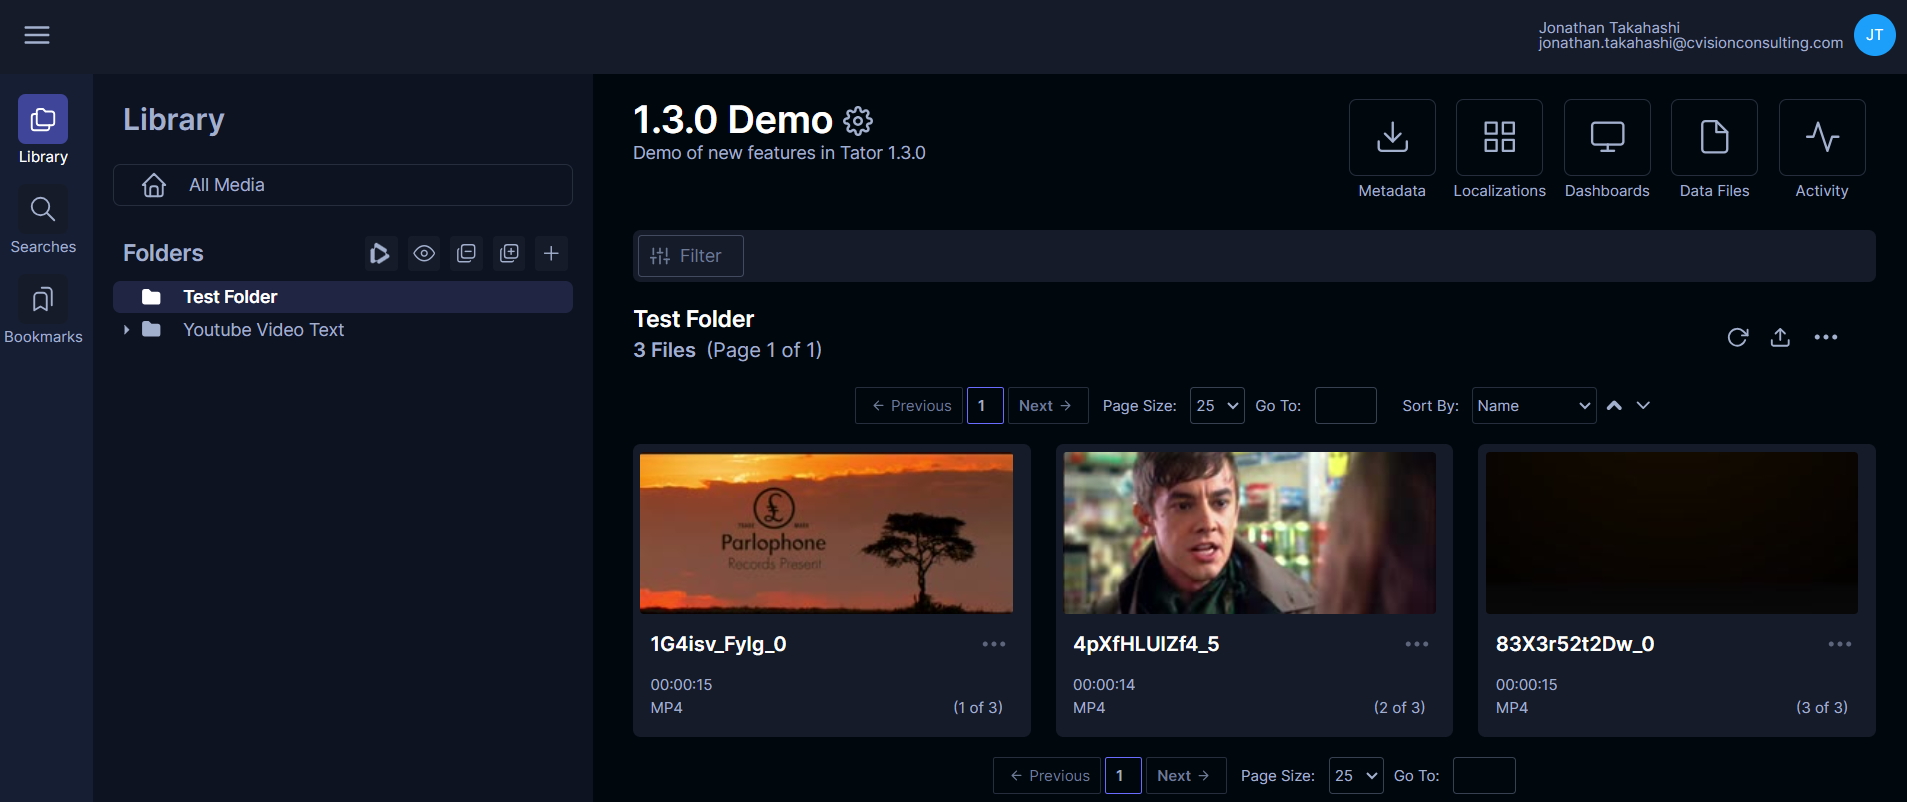
Now the new folder will be displayed and automatically selected.

The folder will contain no media at first. To upload media to the folder, click the upload button with the folder selected and select the videos or images you want to upload. In the example below videos from the YouTube Video Text project are uploaded. View the tutorial for details on uploading using the web interface.
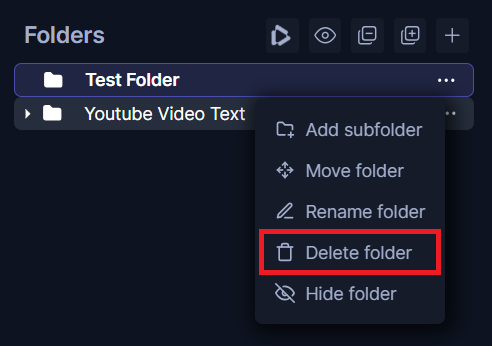
Delete a folder
A folder can be deleted without deleting the media it contains by clicking the Delete folder button in the context menu next to a folder. Any media in the folder will still be accessible from All Media when a folder is deleted with this method.
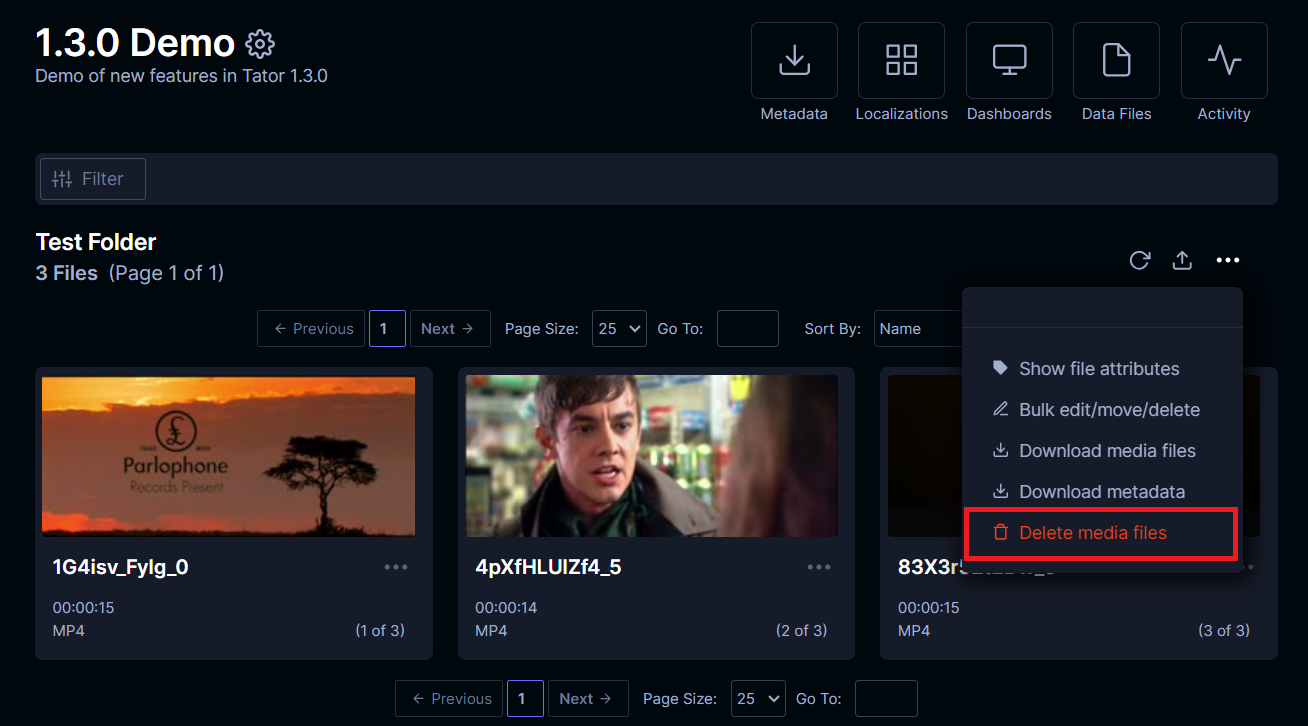
Delete a folder and media it contains
To delete the media in a folder as well as the media it contains, use the Delete media button in the top left of the media cards. Upon confirmation all media in the folder will be deleted from the project along with the folder.
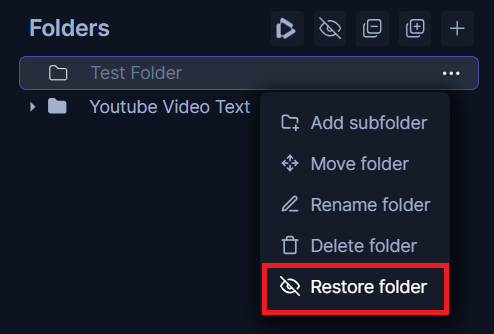
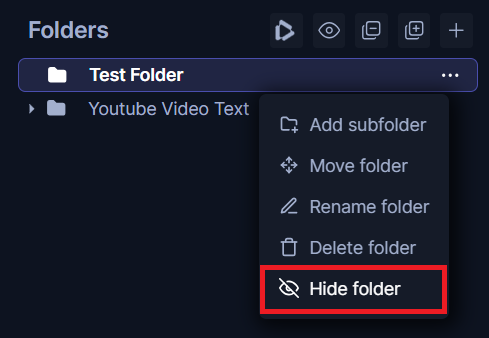
Hiding and restoring a folder
If a folder no longer needs to be displayed (for example, if its contents have already been analyzed) it can be hidden using the Hide folder button in the context menu next to the folder.
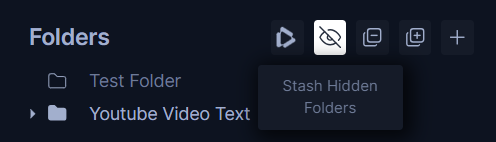
To show hidden folders, click the toggle button to show/hide hidden folders. This will show the hidden folders.
To restore a hidden folder, click the Restore folder button in the context menu next to the hidden folder.