Export data
New in Tator 1.3.
Metadata (localization, states, and media attributes) can be exported from Tator using the Export Data dashboard. This dashboard enables users to select the media, localization, or state types to export, apply corresponding filters, and output the filtered data to a comma separated values (.csv) file.
Access the dashboard
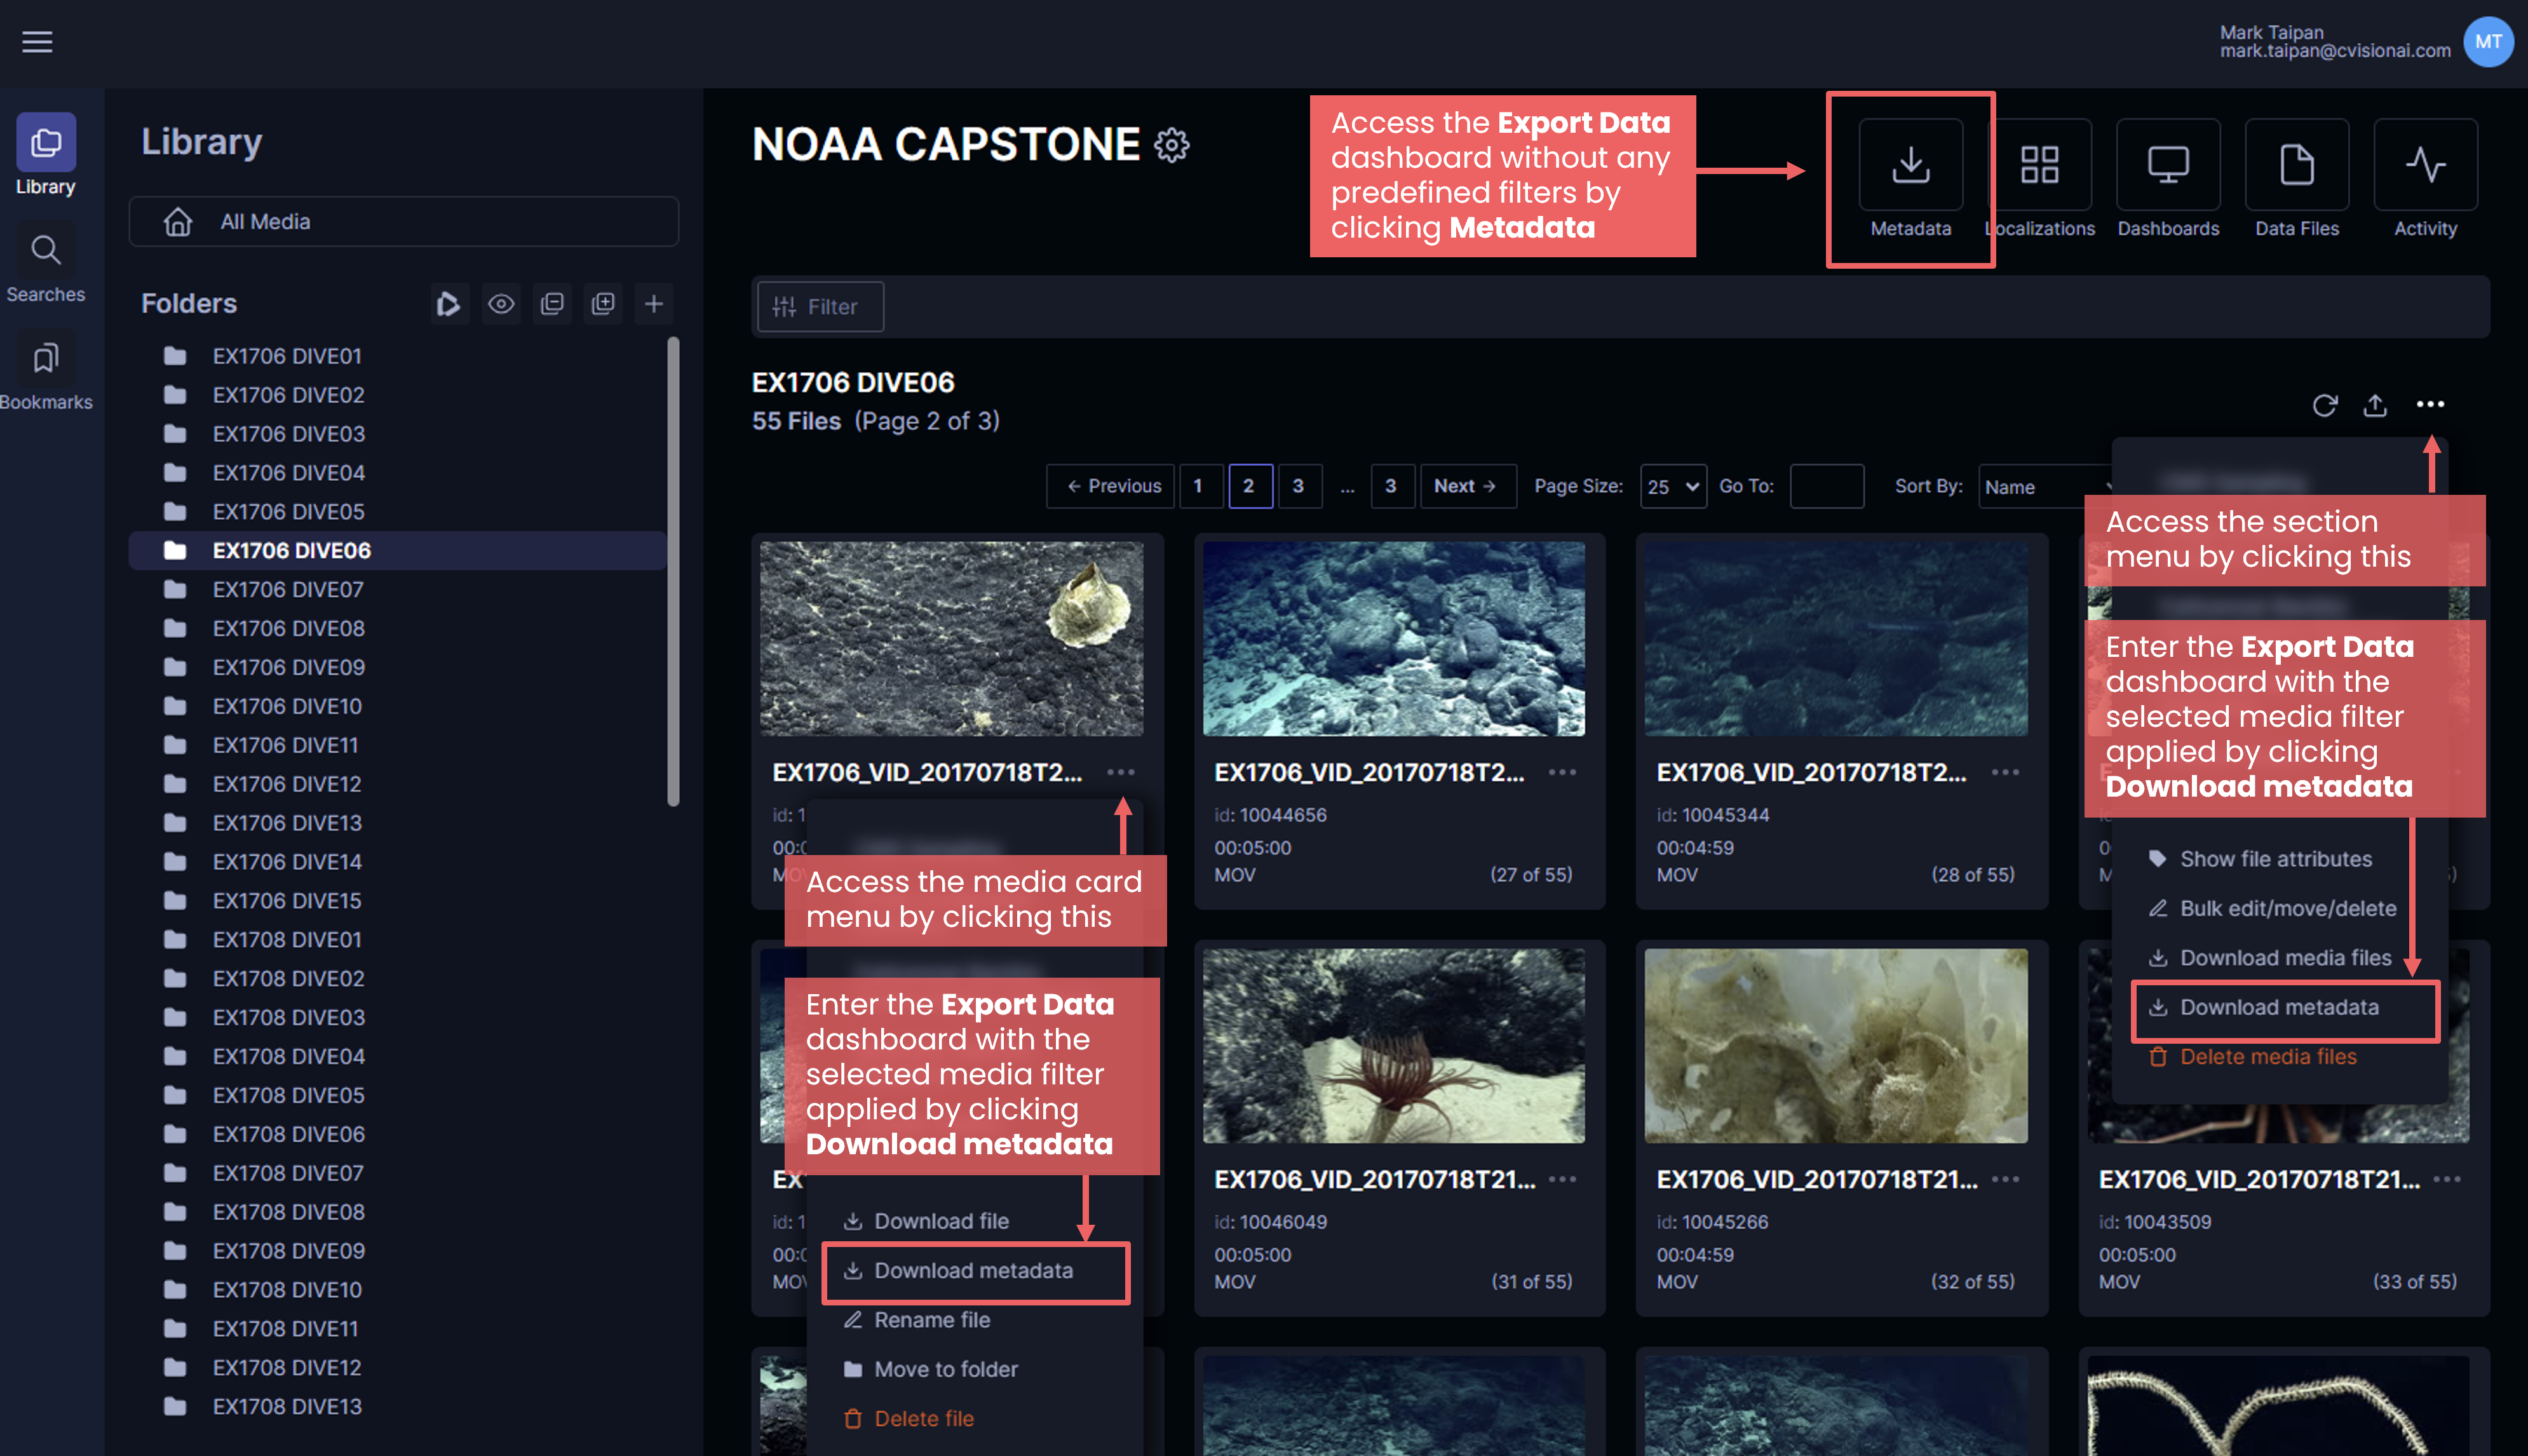
Accessing the dashboard is done primarily in three ways in the project-detail page. Options 2 (section) and 3 (media) apply a filter condition associated with the selected section/media. The first option does not apply any additional media filters.
- Clicking the metadata button at the top of the page
- Selecting the
Download metadatabutton in the section menu - Selecting the
Download metadatabutton in the media menu.
Select export type
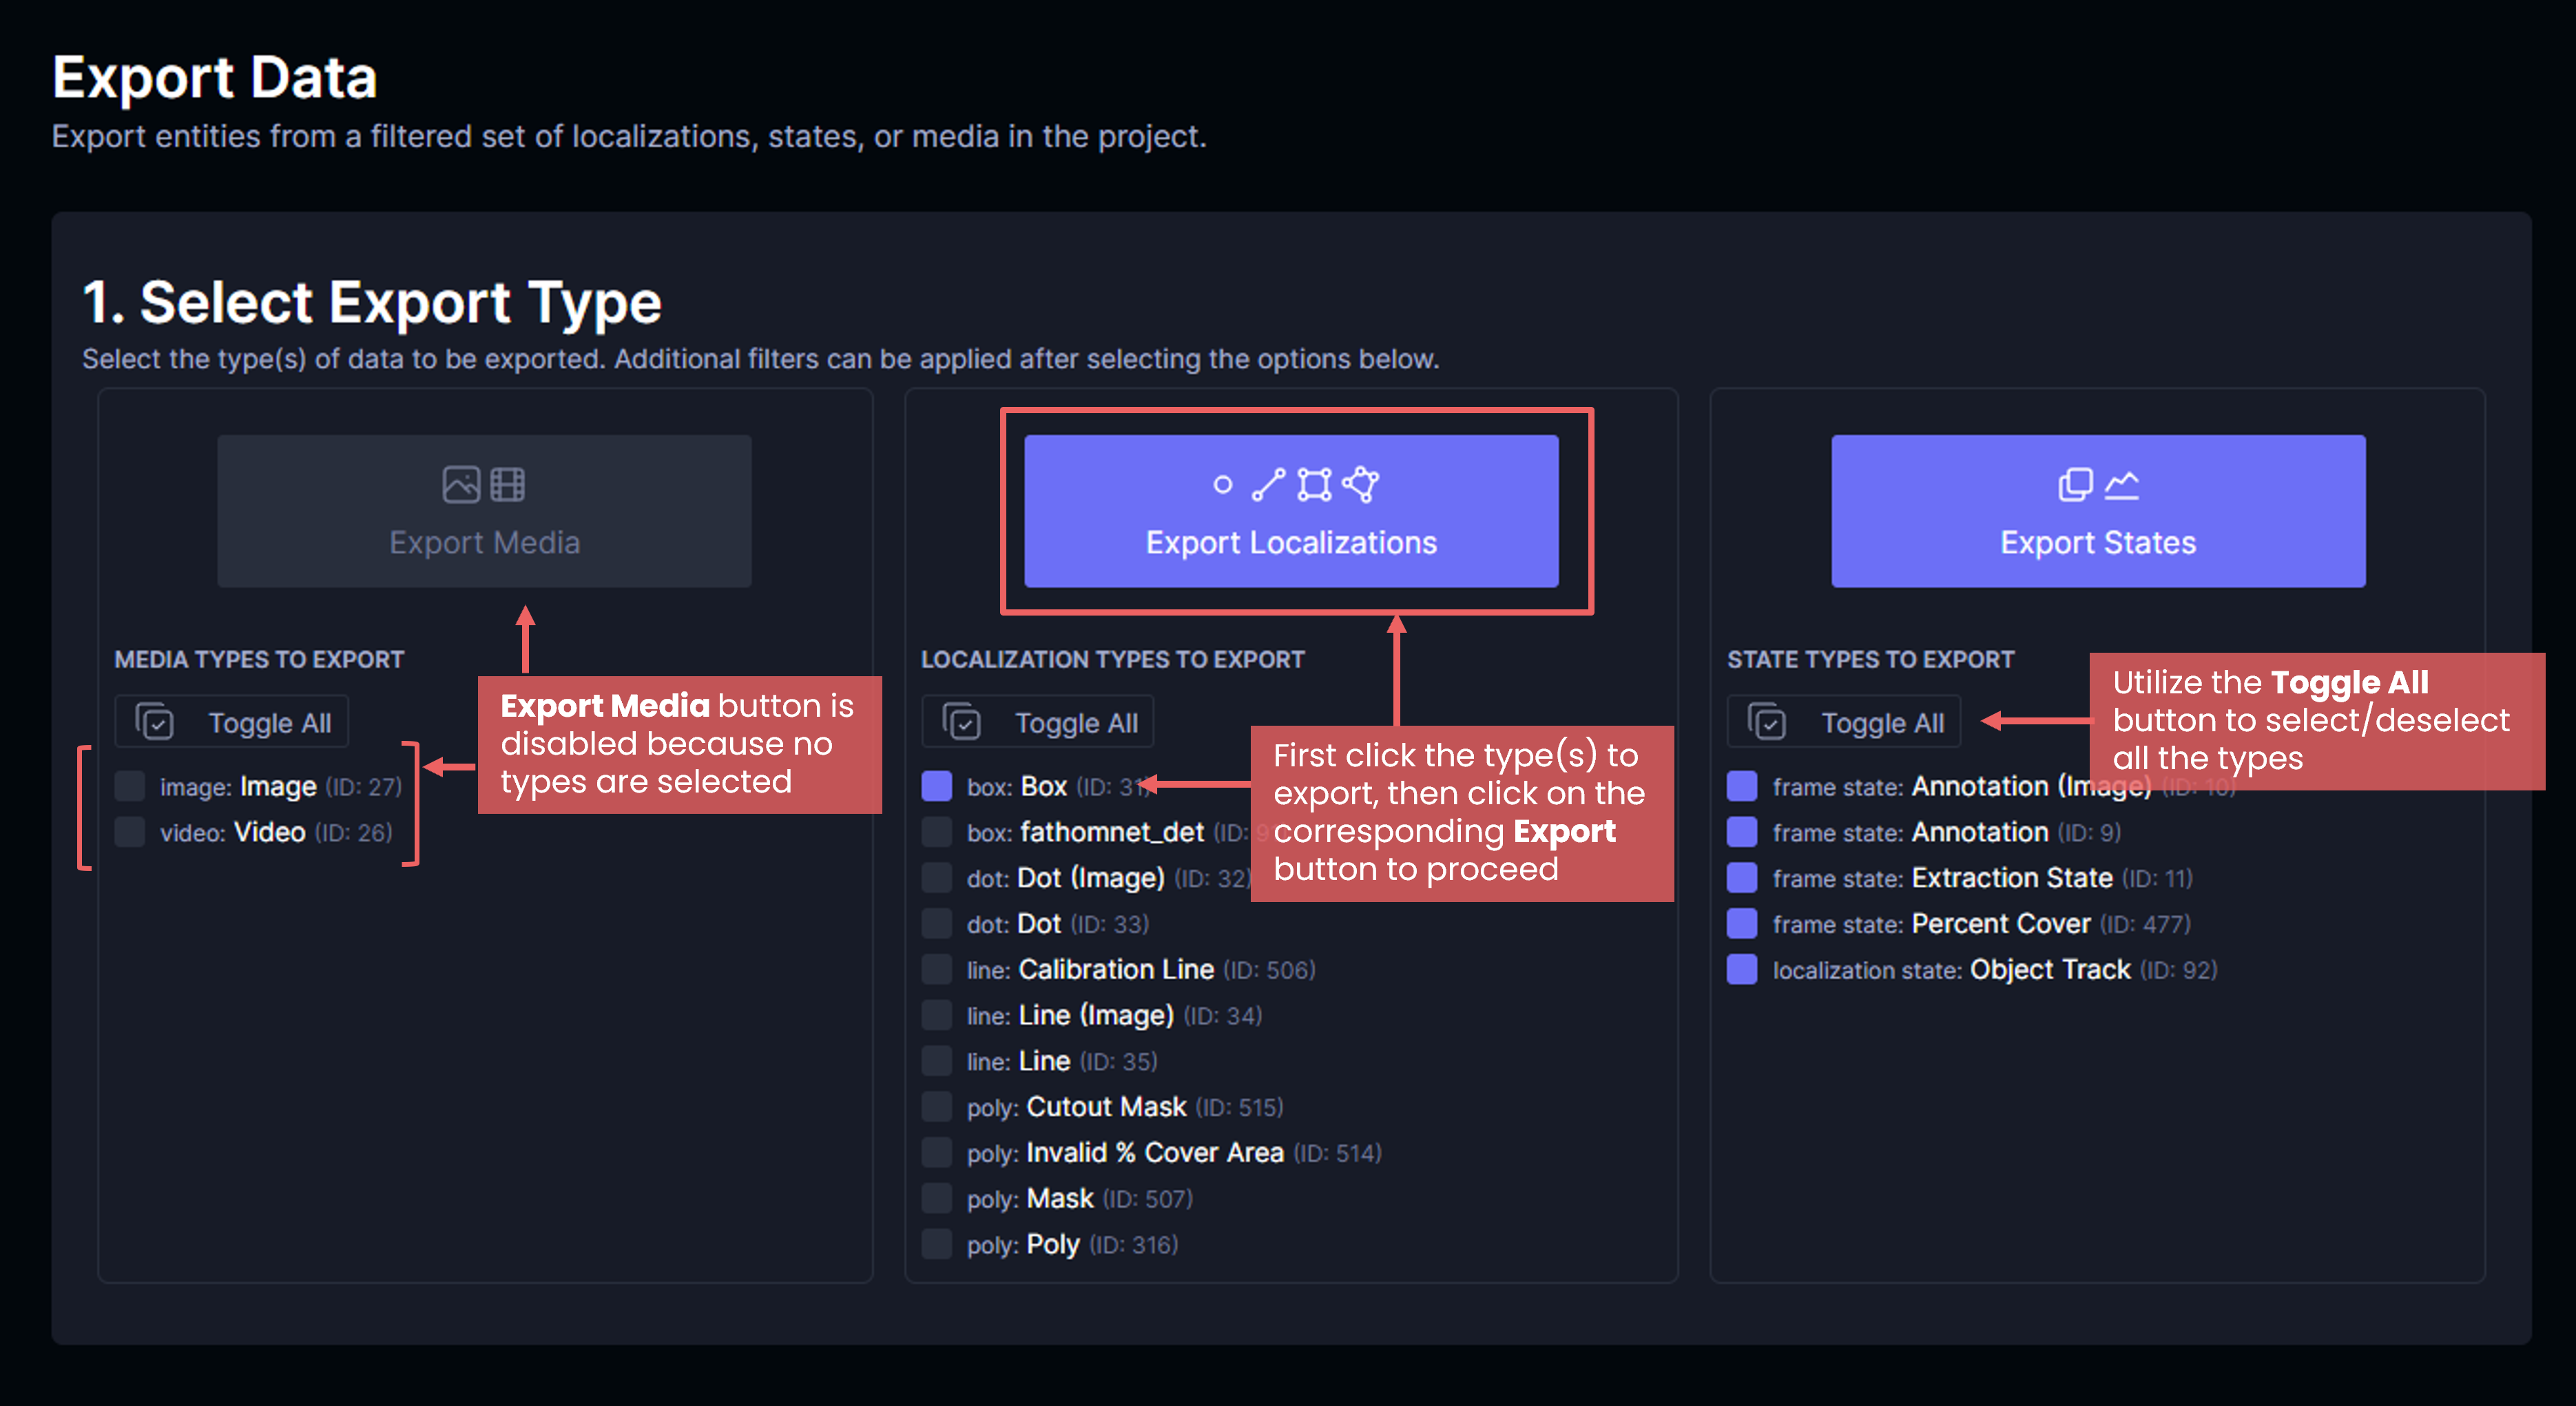
The first step in the Export Data dashboard is to select which entity type to export: Media, Localizations, or States. This is done by selecting the specific types to output. This will be reflected in the data filtering performed later in the dashboard as well as selecting which attributes (in the form of columns in the .csv) can be exported. The Export button will not be enabled until at least one type is selected. The Toggle All button can be used to select/deselect all the types within one of the categories.
Once at least one type has been selected, click the corresponding Export button to proceed to filtering steps.
Filtering the data
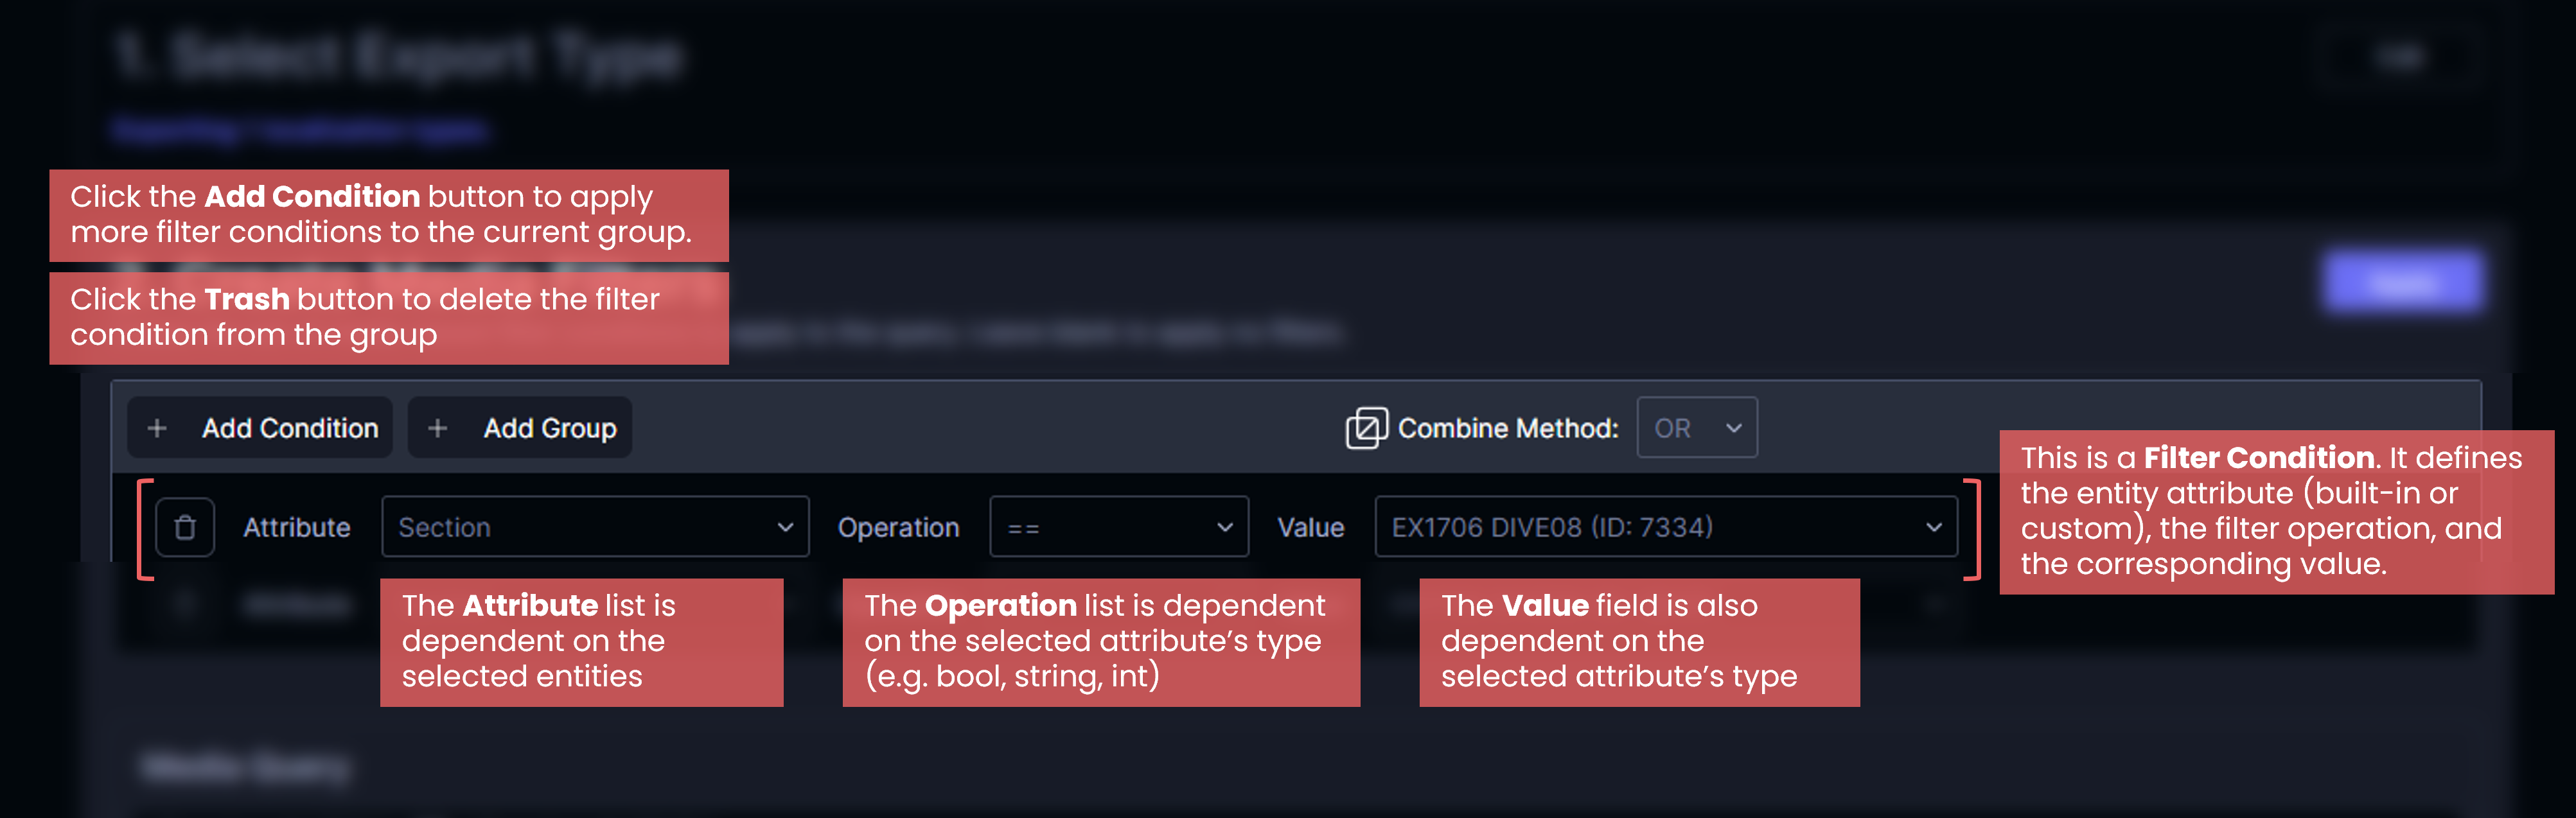
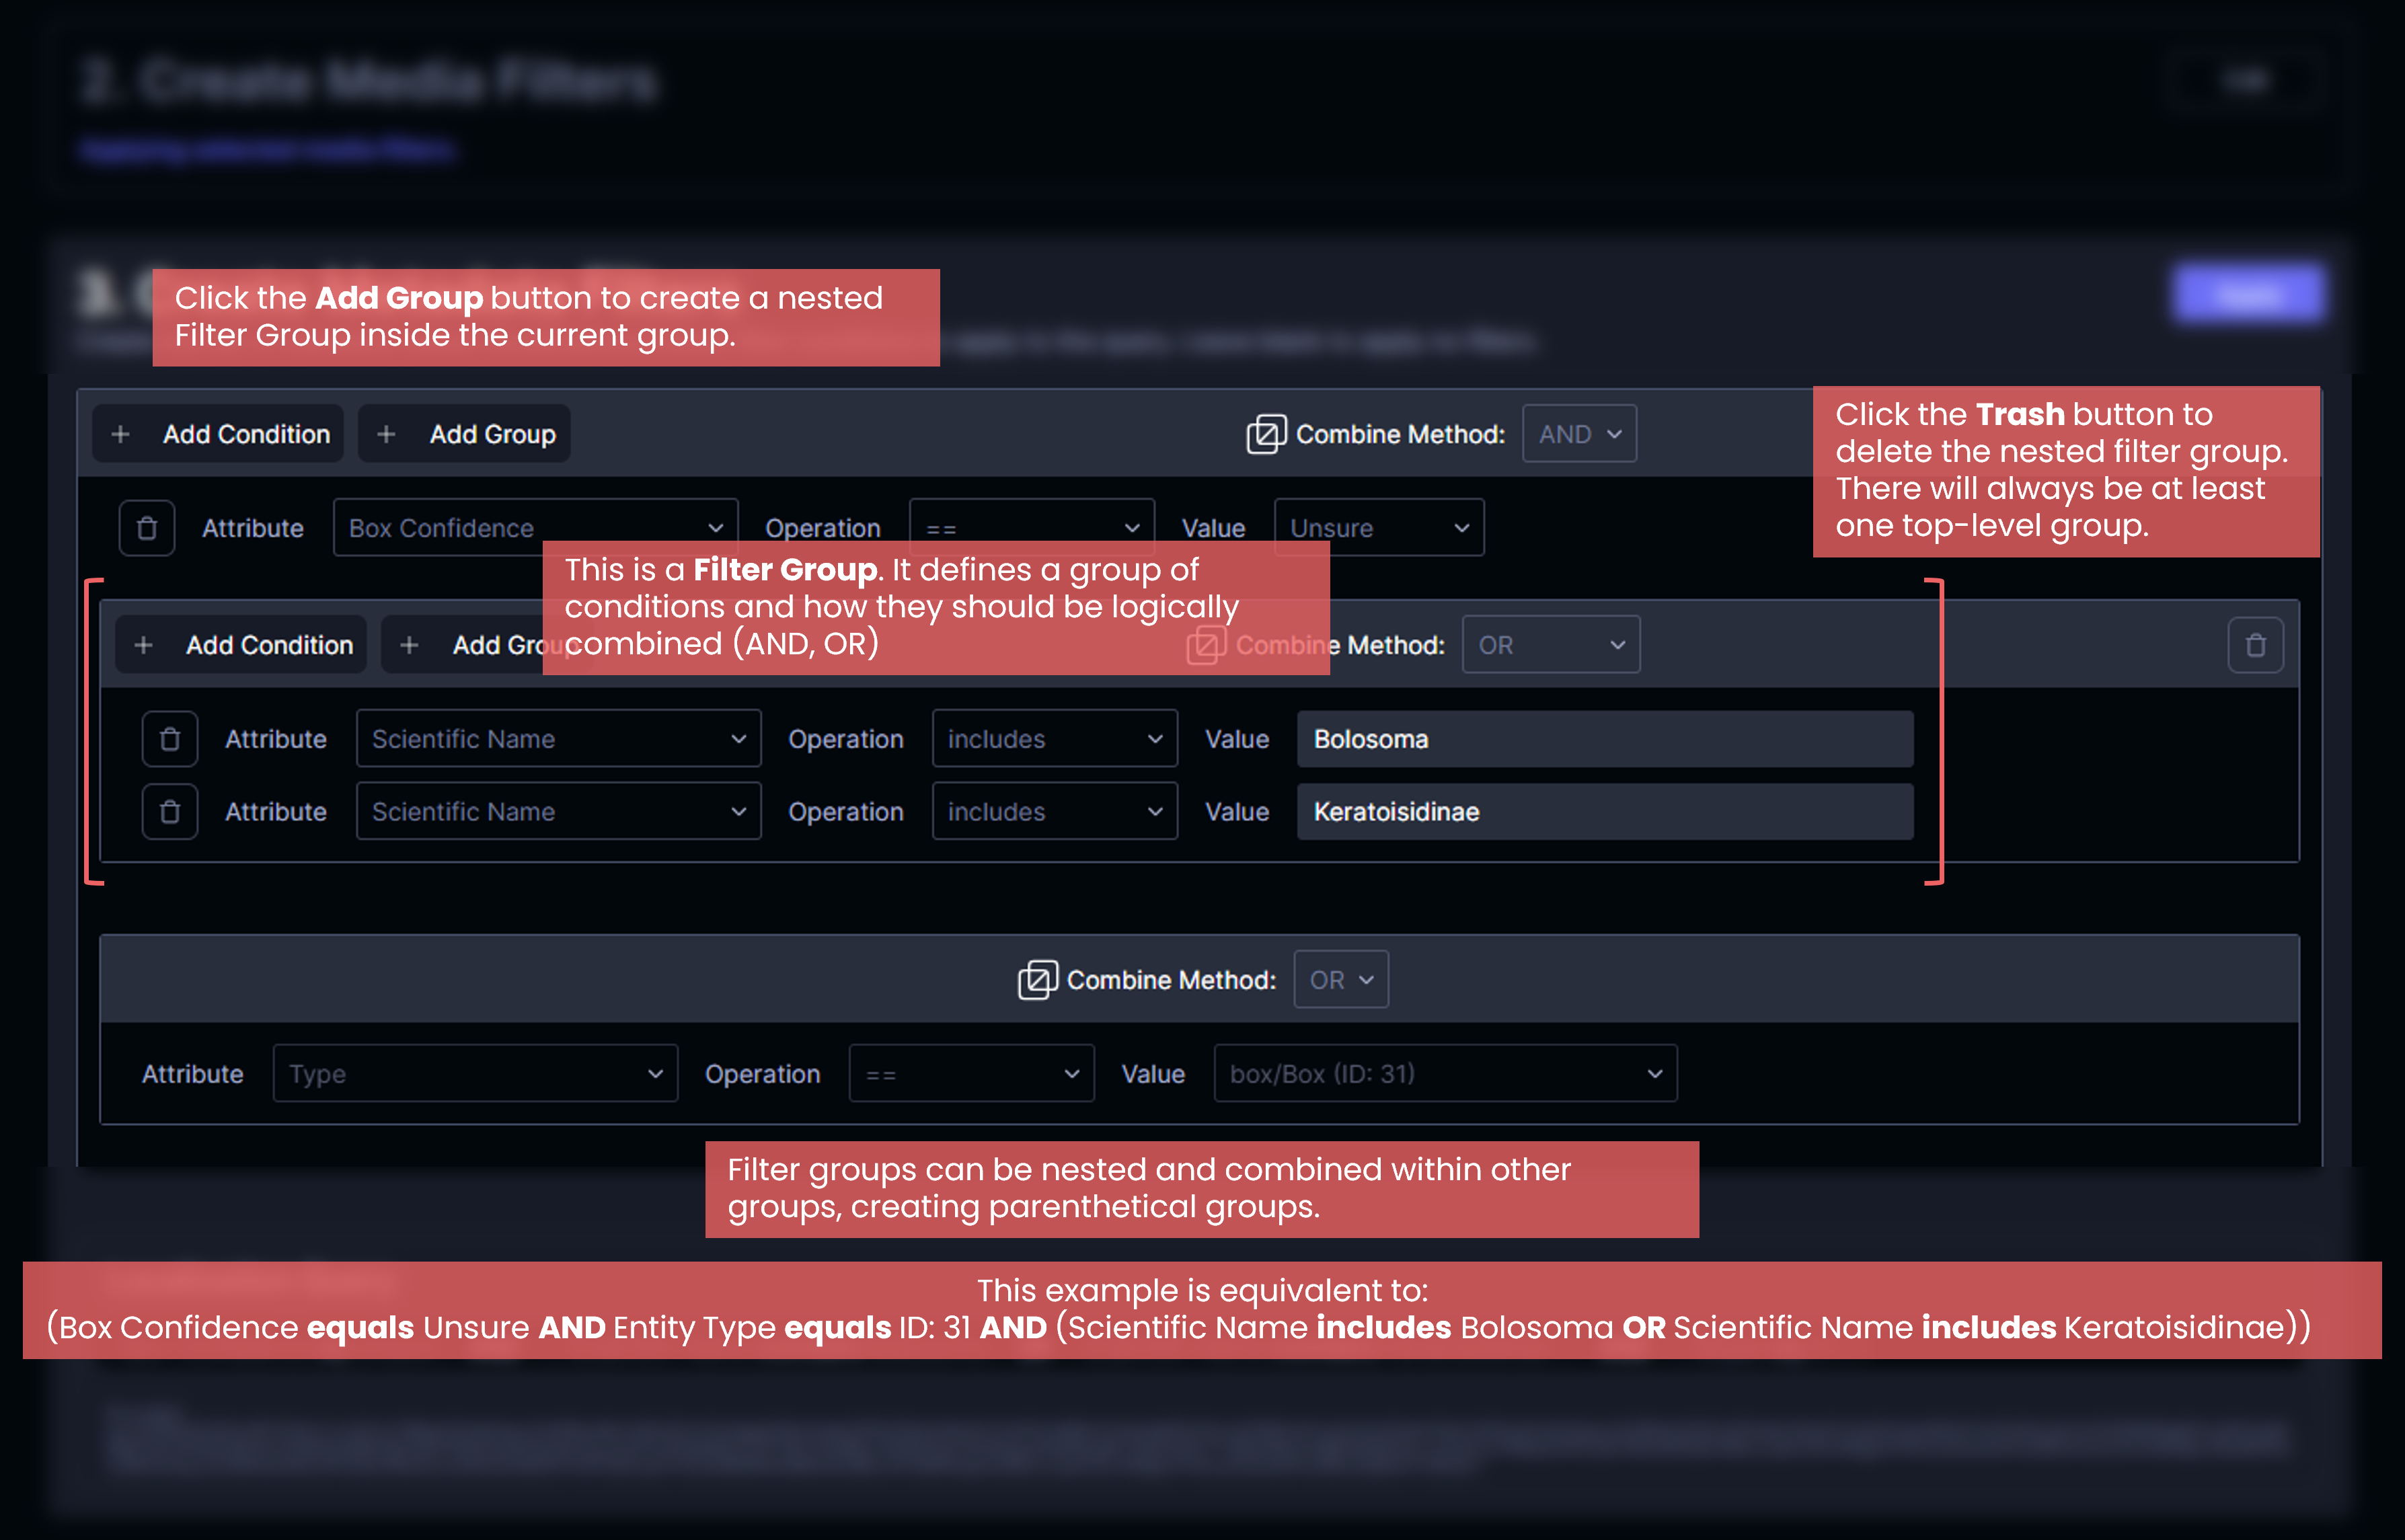
After selecting the types of data to export, the next step is to apply data filters if applicable. The data filters are comprised of two main parts: filter conditions and filter groups. A filter condition is a filter criteria based on an attribute. Filter groups are comprised of filter conditions and/or nested groups. The logical operators AND and OR can be used to combine the filter conditions together. The filter interface adjust the options for the these components based on the attribute types and the selected options.
Apply media filters
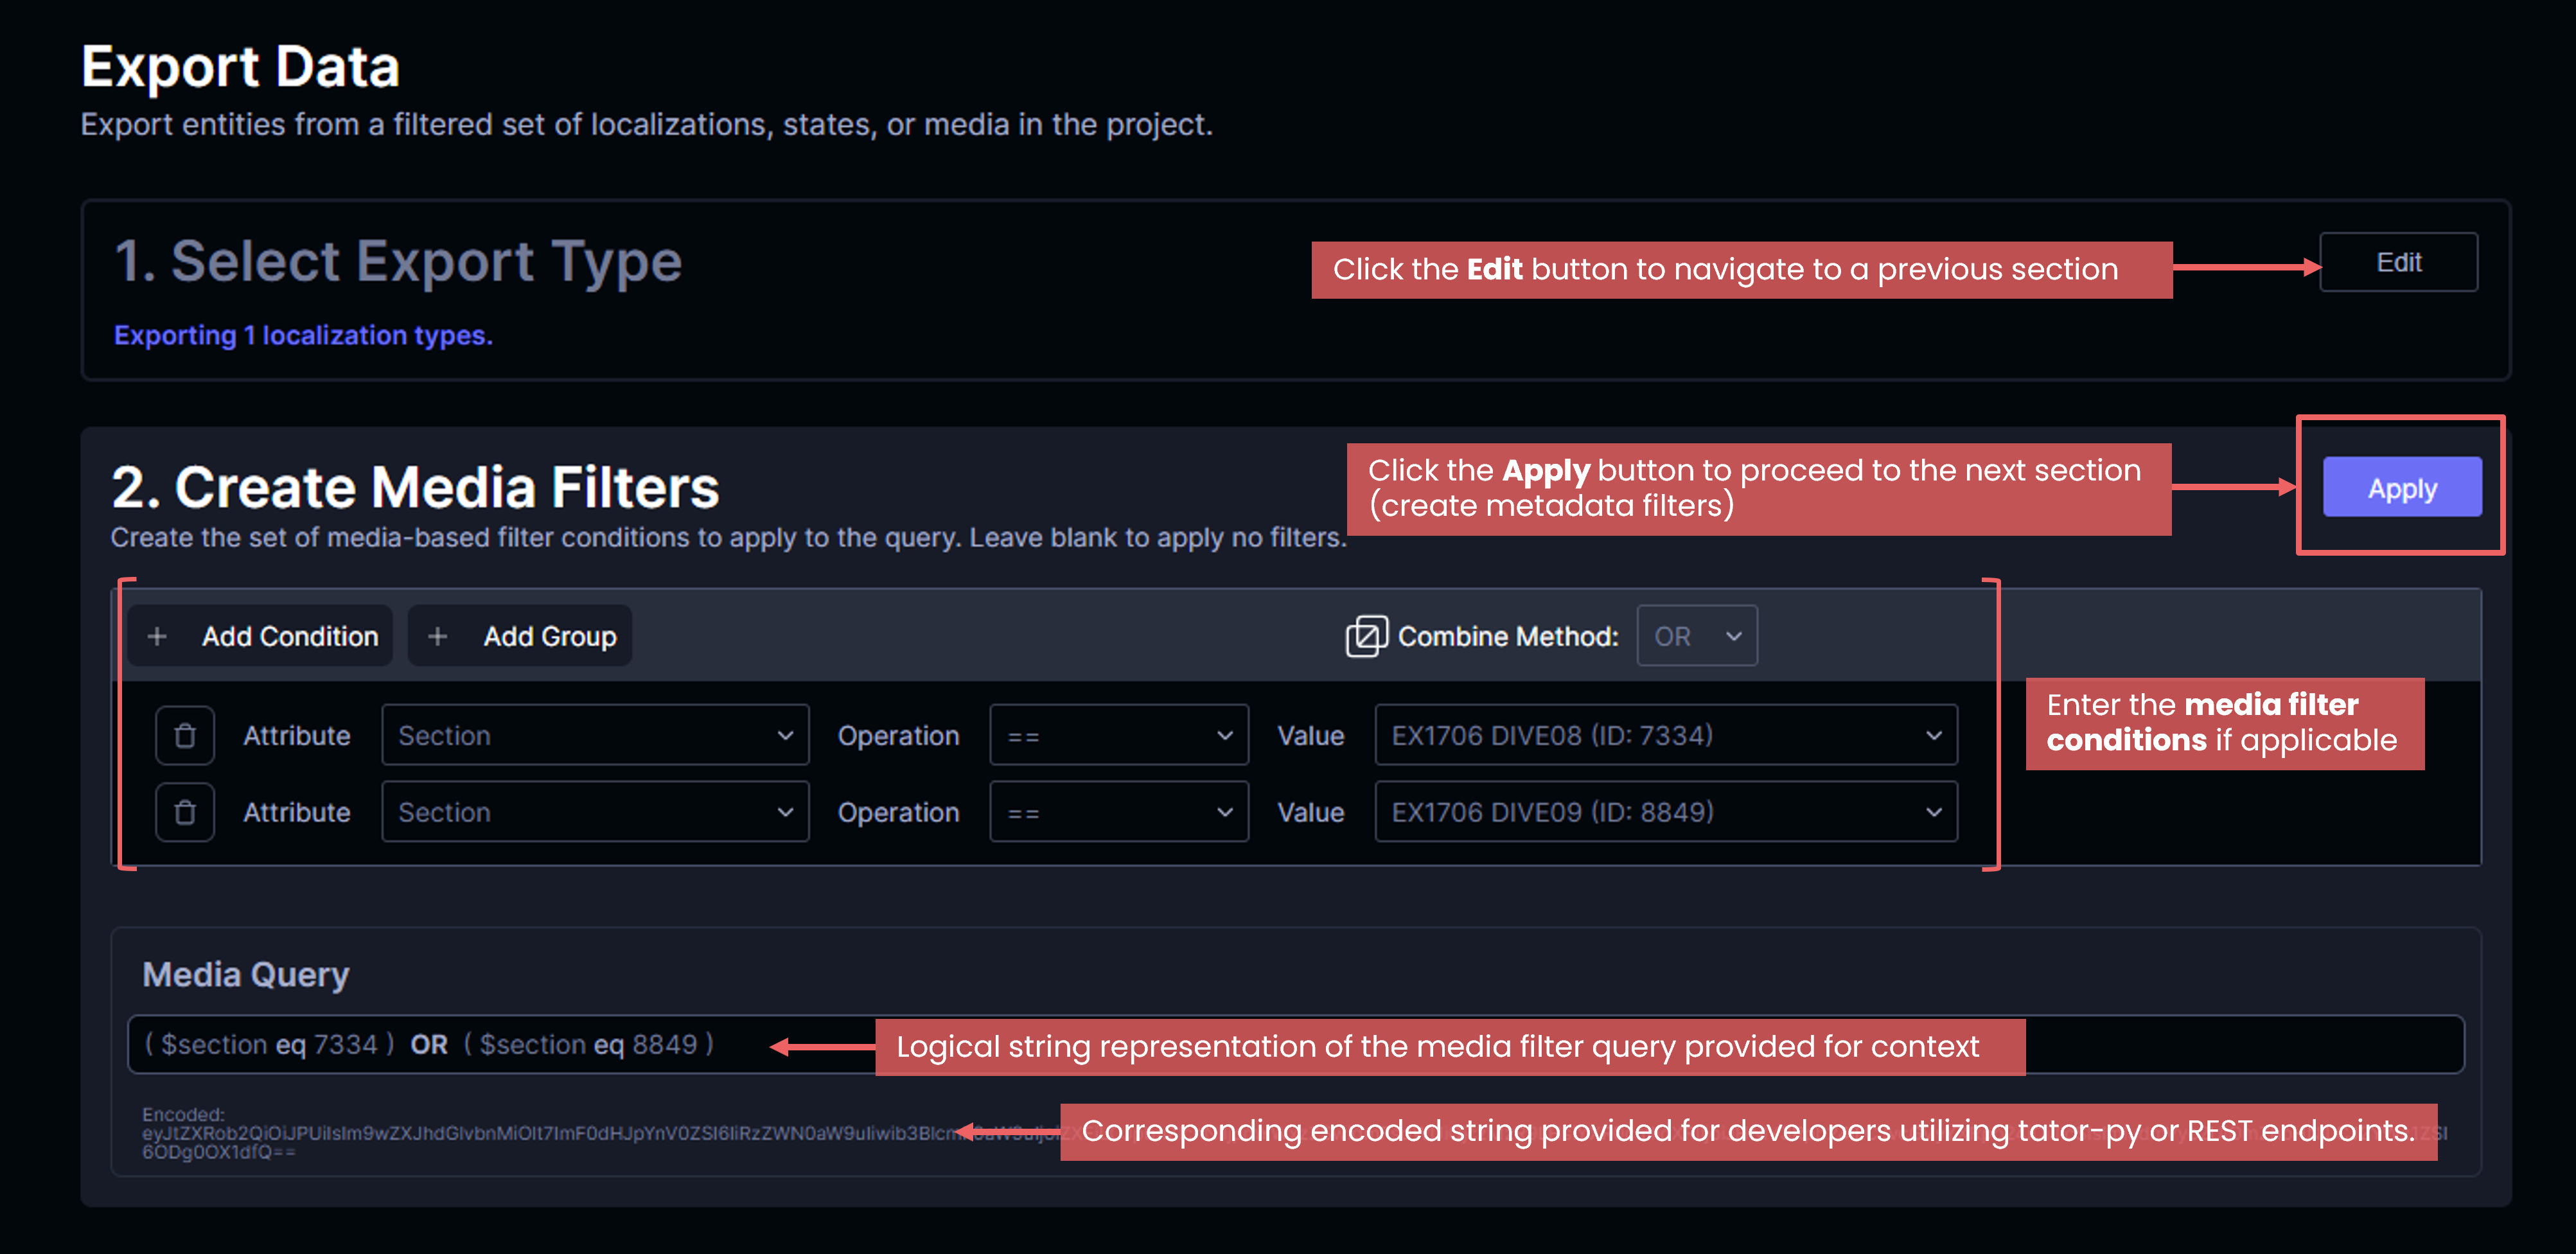
The first set of filters to apply are media-based filters. Use the Add Condition and Add Group buttons to apply filters whose attributes are based on the registered media types. Filters applied will also be displayed as a logical text string which can be helpful for context with parenthetical groups. Once the filters have been selected (if any), click the Apply button to move to the next section, the Metadata Filters.
If the dashboard was accessed using the Download metadata option in either the section menu or the media card menu, the corresponding section or media will be applied automatically as a filter condition.
Tator developer notes: The filter interface provides the encoded string of the applied filters. This encoded string can be copied into the encoded_params field of the Medias REST endpoint or the related_encoded_params field of the Localizations and States REST endpoints. The logical text string displays the attribute names, operations, and values that the backend expects to parse.
Apply metadata filters
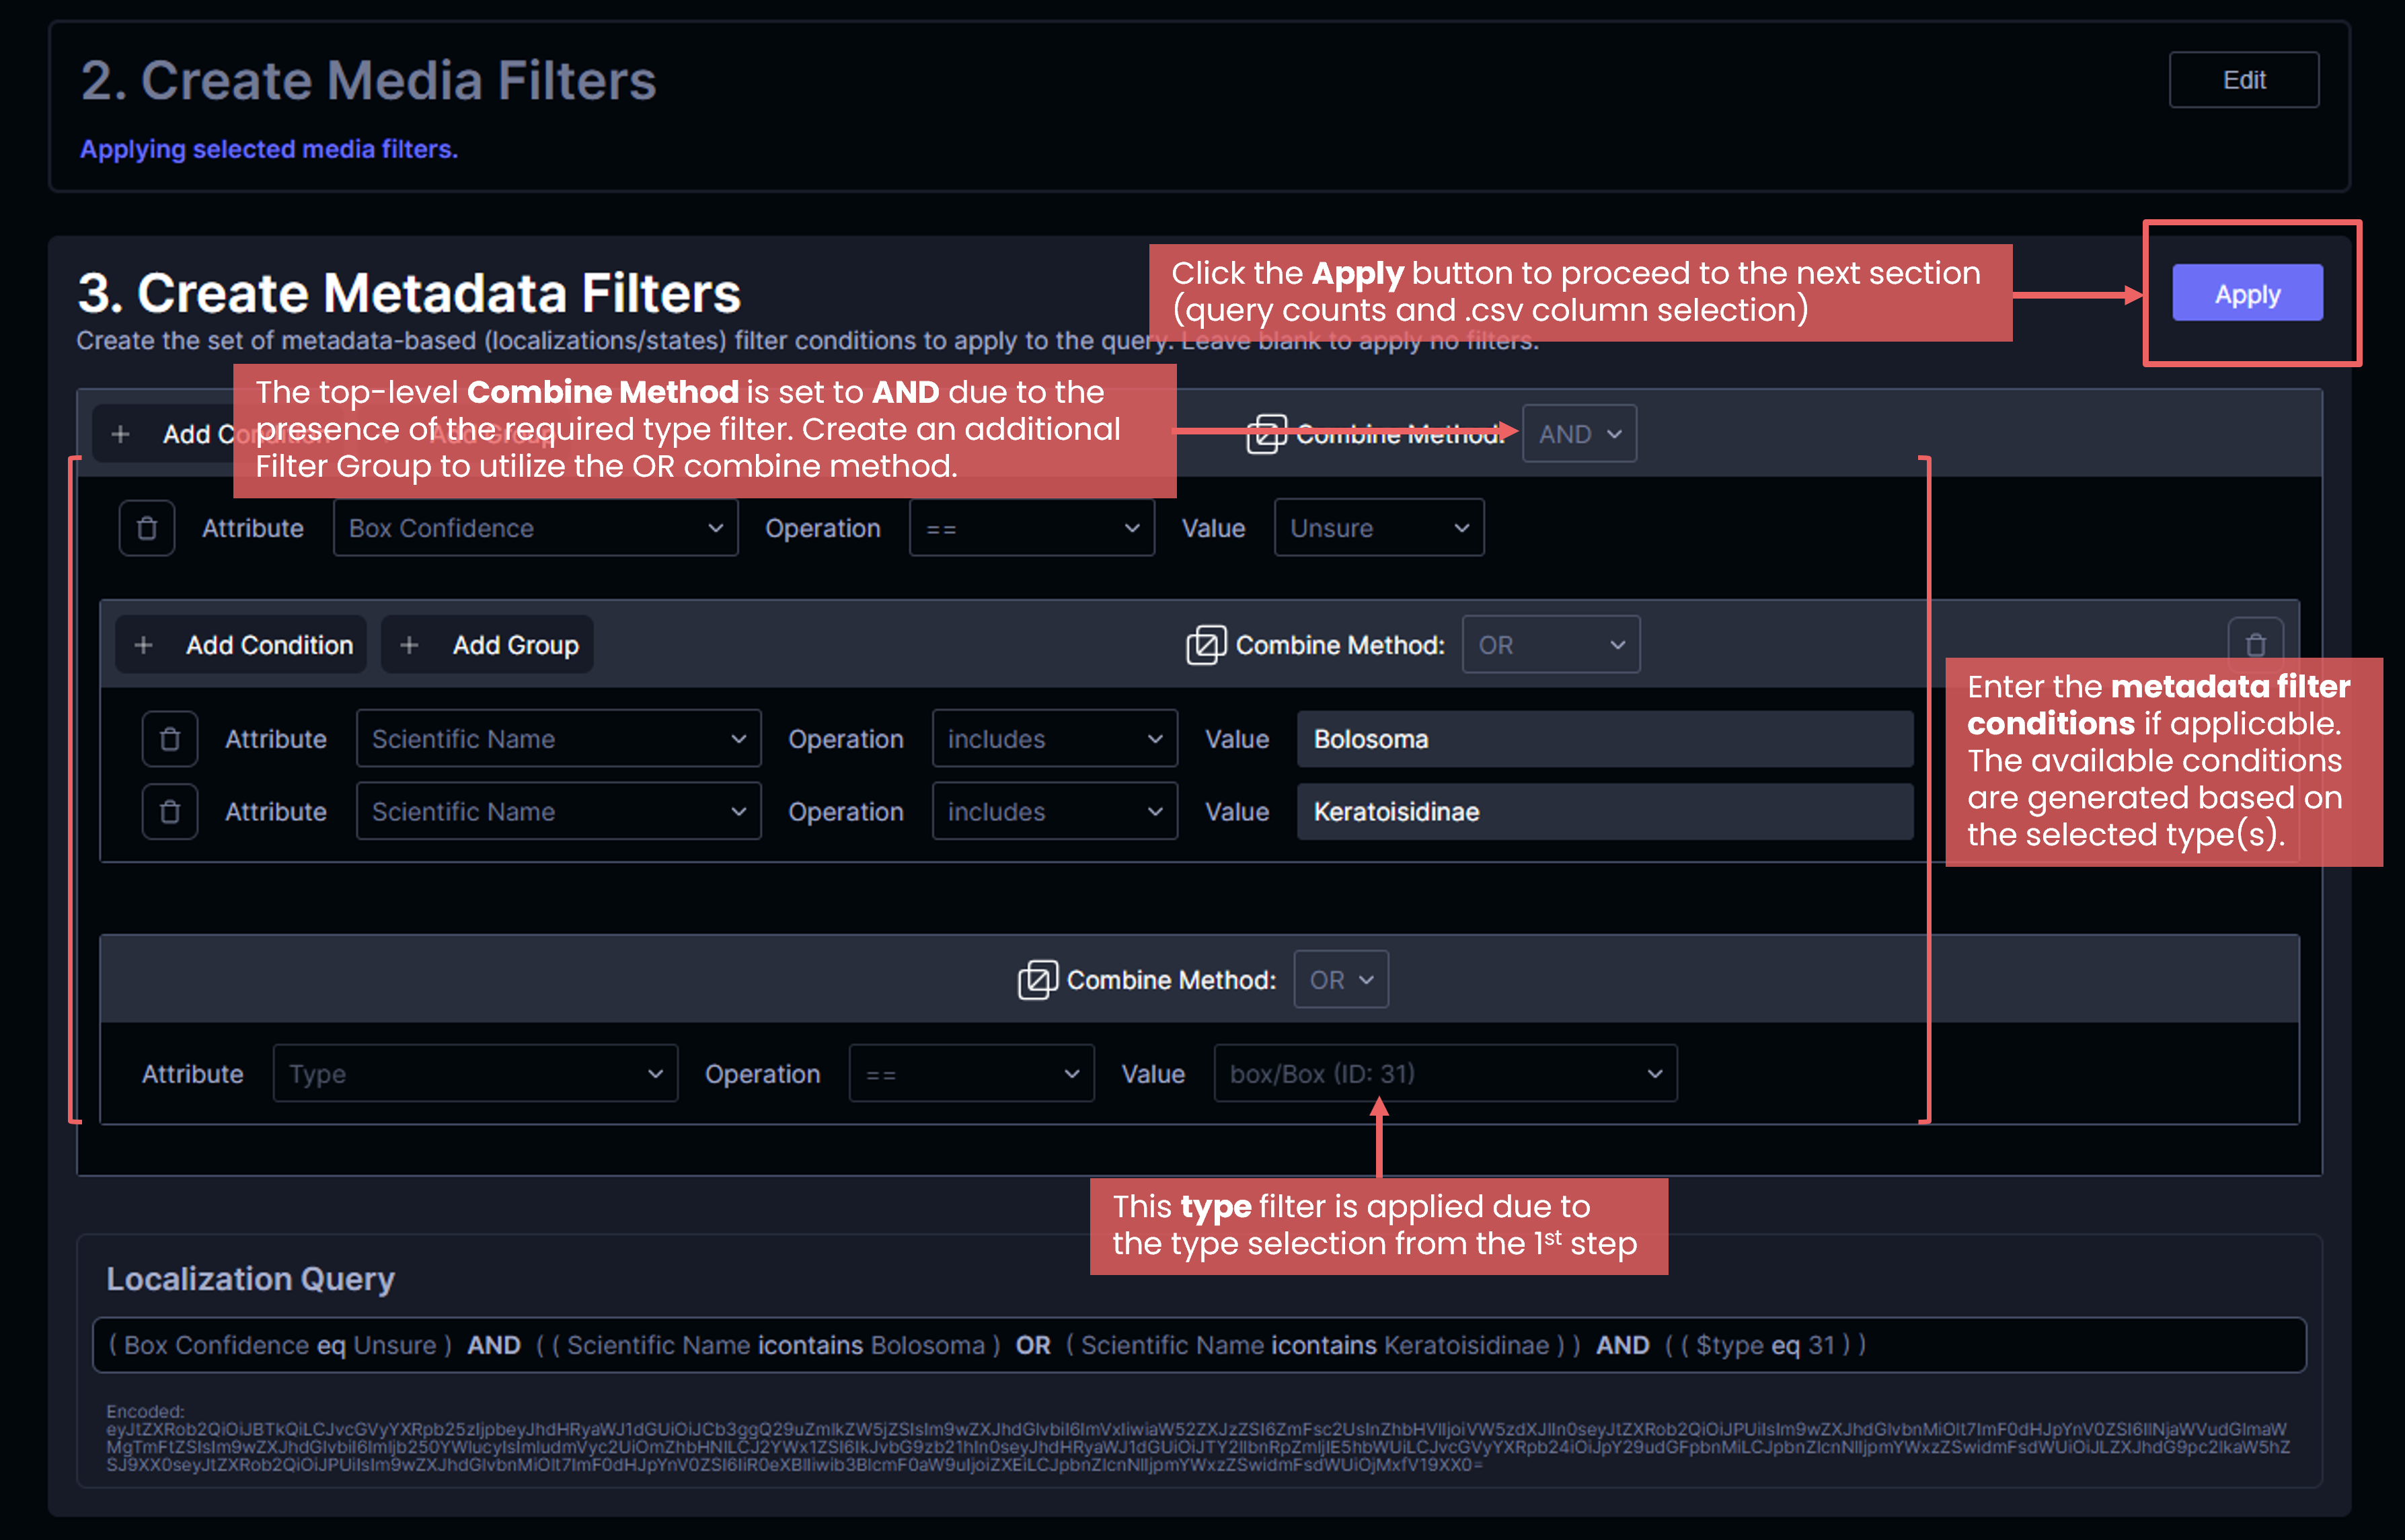
The second set of filters to apply are metadata-based filters. The filters shown here are based on the selected export types. If localization or state types were selected the attribute selection in the filter conditions are based on those selected types. If media types were selected, the attribute selection would be based on all of the localization and state types. Similar to the previous section, use the Add Condition and Add Group buttons to apply filters based on the registered localization/state types. Once the filters have been selected (if any), click the Apply button to run the count query and move to the column selection section.
Tator developer note: The encoded string displayed here can be copied into the encoded_params field of the Localizations and States REST endpoints or the related_encoded_params field of the Medias REST endpoint.
Select .csv columns
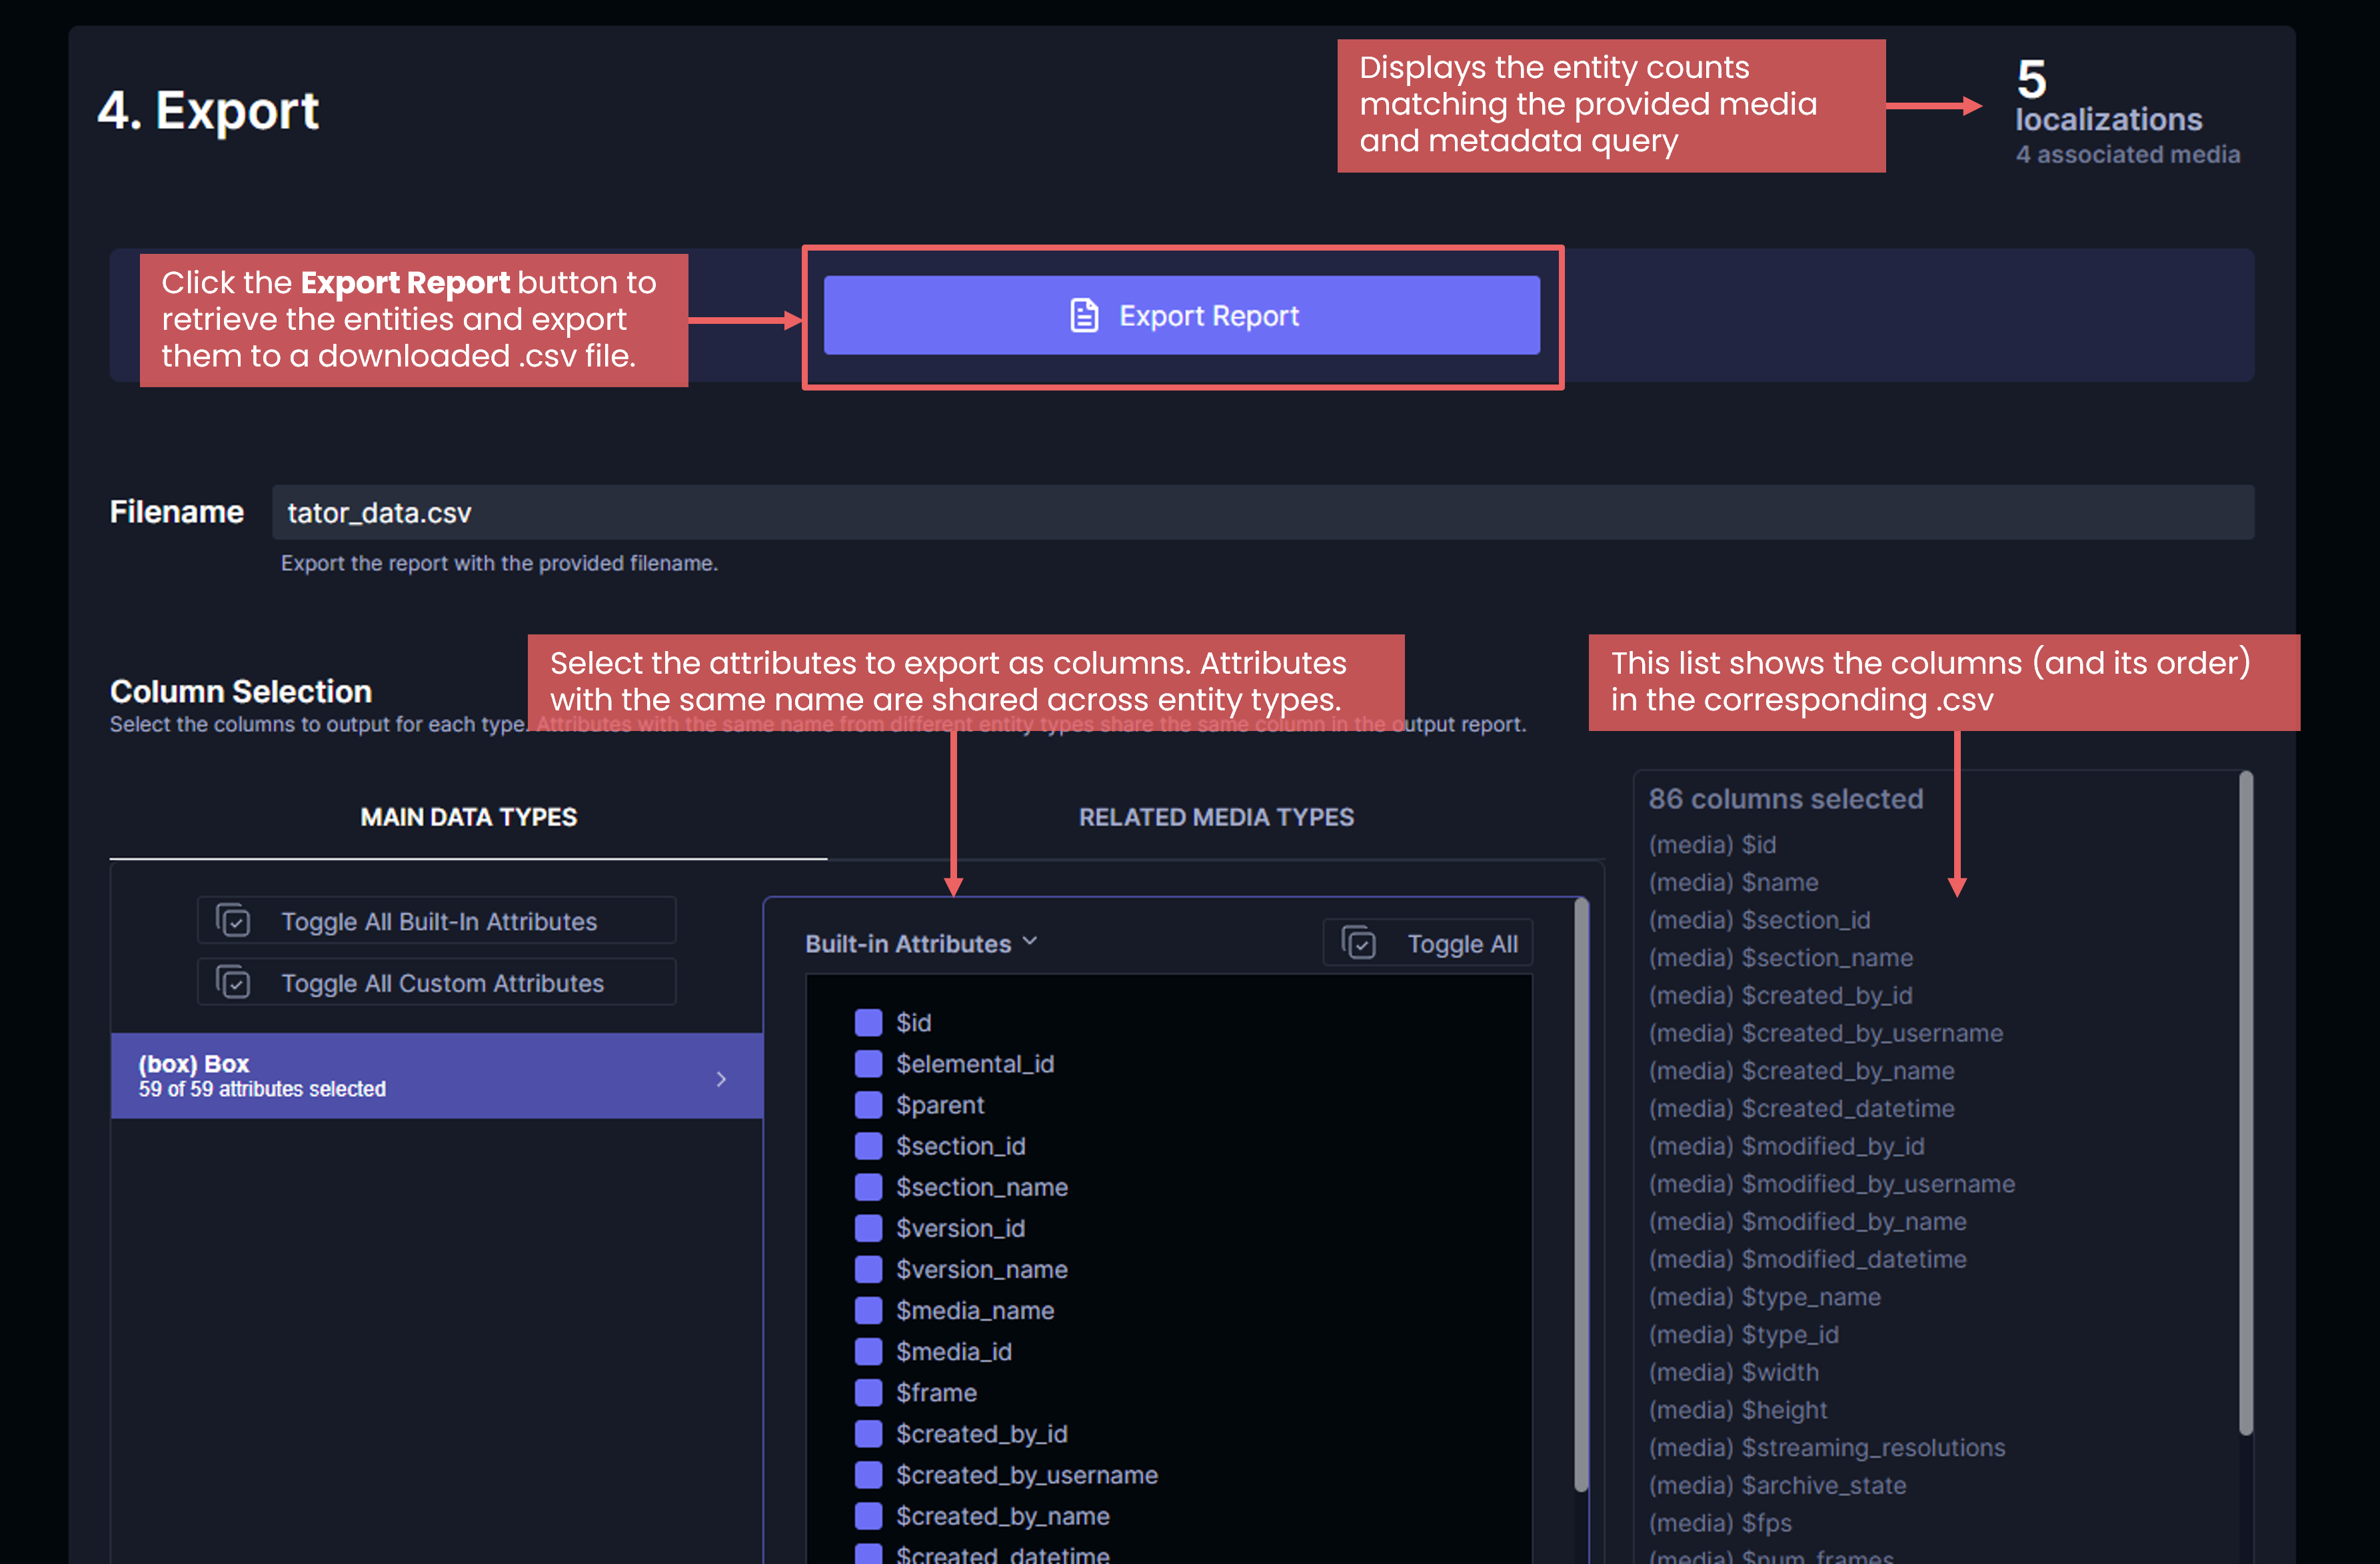
Once the filters have been applied, the entity count matching the filter is obtained. When the count is obtained, the count is displayed on the top right portion of the UI. Use this to verify the filters have been curated correctly prior to exporting the report.
The columns in the report are defaulted to include all of the built-in attributes and the custom attributes of the entity types selected for export. These can be adjusted by using the page tabs, checkboxes, and the toggle buttons to select/deselect attributes to export. Any attributes that share the same name utilize the same column. Built-in attributes show up first in the column header order in a predefined order and are then followed by the custom attributes in alphabetical order. If the exported type are states or localizations, the related media attributes are also provided as part of the exported .csv file with their columns prepended with (media).
After the columns have been selected, and the count has been retrieved and verified, click on the Export Report button. This will initiate the query for the entities themselves, and once retrieved they will be written to an automatically downloaded .csv file.