Project Specific Buckets on GCP
Introduction
This tutorial will walk you through how to configure a Google Cloud Storage bucket and service account for use with Tator on Google Cloud Platform (GCP), how to register the bucket with your organization in Tator, and how to use the bucket in a specific Tator project.
To begin this tutorial, you will need GCP storage admin privileges on a GCP project, the gsutil command line utility, and administrative permissions for your organization in Tator.
Create and configure a GCS bucket on GCP
From the GCP storage browser, click Create Bucket.
Set a bucket name (we will use
my-tator-bucket), region, default storage class, and access control: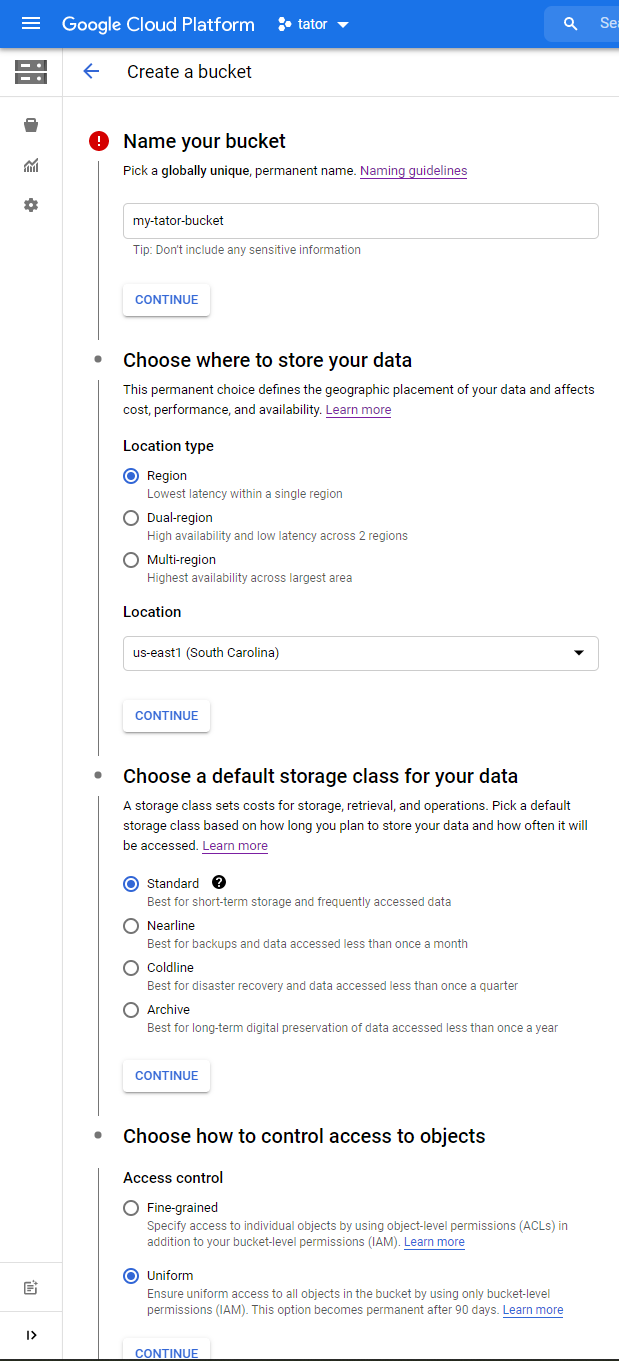
Click CREATE
Enable bucket versioning from the command line with gsutil:
gsutil versioning set on gs://my-tator-bucketCreate a file containing the lifecycle policies for the bucket (we'll call it
lifecycle_config.json):{
"rule": [
{
"action": {
"storageClass": "COLDLINE",
"type": "SetStorageClass"
},
"condition": {
"daysSinceNoncurrentTime": 30,
"isLive": false
}
},
{
"action": {
"type": "Delete"
},
"condition": {
"daysSinceNoncurrentTime": 365,
"isLive": false
}
}
]
}Set the lifecycle policies using gsutil (using the filename and bucket name from before)
gsutil lifecycle set lifecycle_config.json gs://my-tator-bucketCreate a file containing the CORS configuration (we'll call it
cors.json):[
{
"maxAgeSeconds": 3600,
"method": ["GET", "PUT", "POST", "HEAD"],
"origin": ["https://www.tatorapp.com", "https://cloud.tator.io"],
"responseHeader": ["*"]
}
]Set CORS configuration with gsutil (using the filename and bucket name from before)
gsutil cors set cors.json gs://my-tator-bucket
Your bucket is now ready to use with your project.
Create and configure an IAM service account on GCP
- Follow the instructions for creating a service account
- Give it the role of "Storage Admin"
- Navigate to service accounts and click on the newly created service account
- Click on the Keys tab
- Click ADD KEY > Create new key
- Use key type JSON (the default)
- Click CREATE
- Make note of the filename (we will use
tator-keys.json) and location. If this file is lost, its contents cannot be recreated and a new key must be created.
The IAM account is now ready to use with Tator.
Create a Bucket and Project in Tator
We will use tator-py to register the bucket to our organization, then create a project that will use that bucket. You can also change the bucket property of an existing project.
- Use django shell to create a Bucket object, loading the GCP service account info from the file created in the previous steps:
import json
with open("tator-keys.json", "r") as fp:
    key_info = json.load(fp)

b=Bucket.objects.create(organization=Organization.objects.get(pk=ORG_ID), name=BUCKET-NAME, config=key_info, store_type=ObjectStore.GCP, archive_sc='STANDARD')
Use the bucket ID to create a project:
p=Project.objects.get(pk=Foo)
p.bucket = b
p.save()
The project is now ready to use.