Project Specific Buckets on AWS
Introduction
Tator uses S3-compatible storage for all media, including streaming and archival videos, images, and thumbnails. Every Tator deployment has a single default bucket that can be used for all projects, however a different bucket can be specified at the organization level and used on a per-project basis. This tutorial will walk you through how to configure an S3 bucket and IAM account for use with Tator on Amazon Web Services (AWS), how to register the bucket with your organization in Tator, and how to use the bucket in a specific Tator project.
To begin this tutorial, you will need S3 administrative privileges on an AWS account and administrative permissions for your organization in Tator.
Create and configure an S3 bucket on AWS
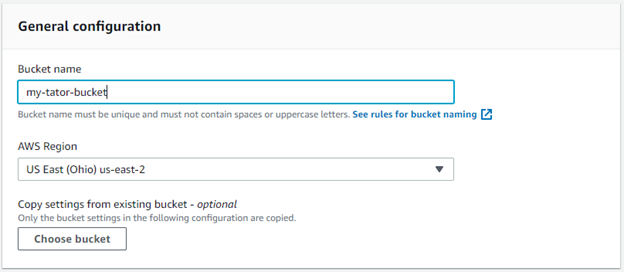
From the AWS console, go to Services > S3 and click Create Bucket.
Set a bucket name and region.
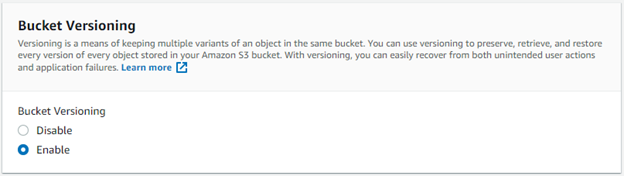
Enable bucket versioning.
Click Create bucket.
Open the bucket and go to the Management tab.
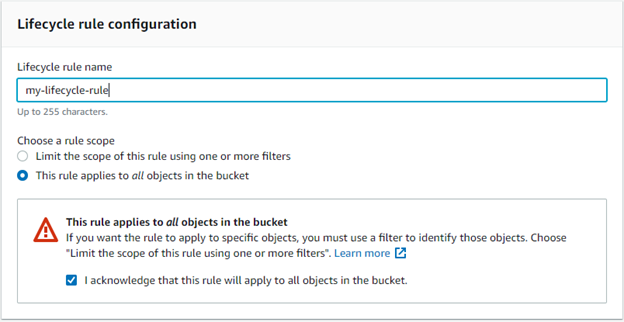
Click Create Lifecycle Rule.
Select a lifecycle rule name and apply to all objects.
Select Transition previous versions of objects between storage classes and Permanently delete previous versions of objects.
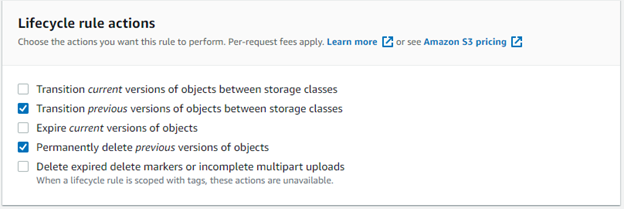
Transition noncurrent versions to Glacer Deep Archive after 30 days.
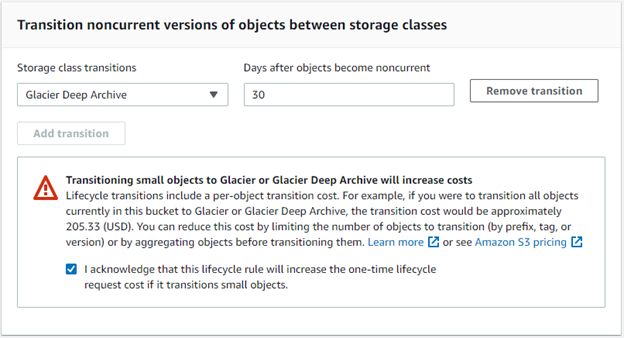
Permanently delete previous versions of objects after 365 days.

Click Create rule.
To support media archiving, another lifecycle rule must be created for transitioning objects with a specified tag. Click Create Lifecycle Rule again.
Set the lifecycle rule name and object tag filter for the key
archiveand valuetrue.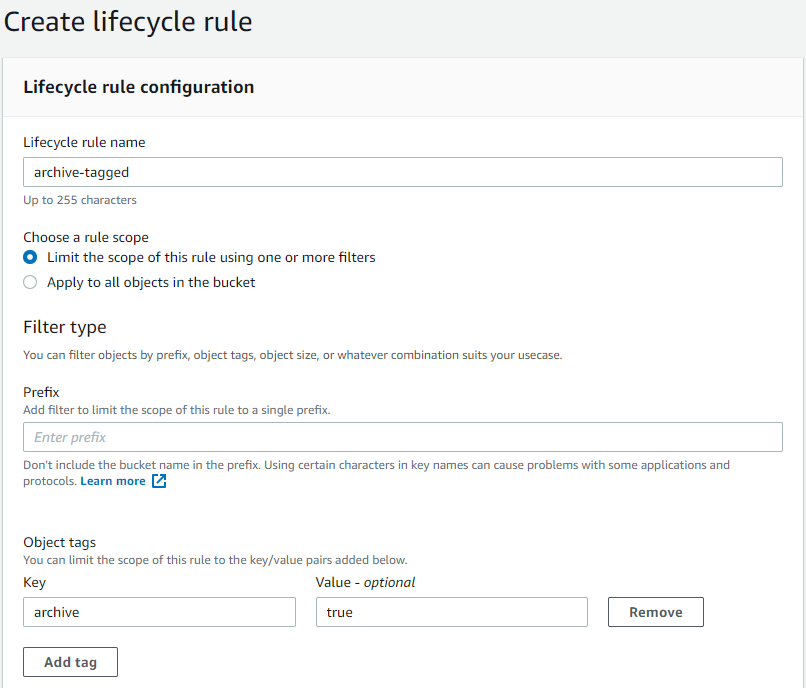
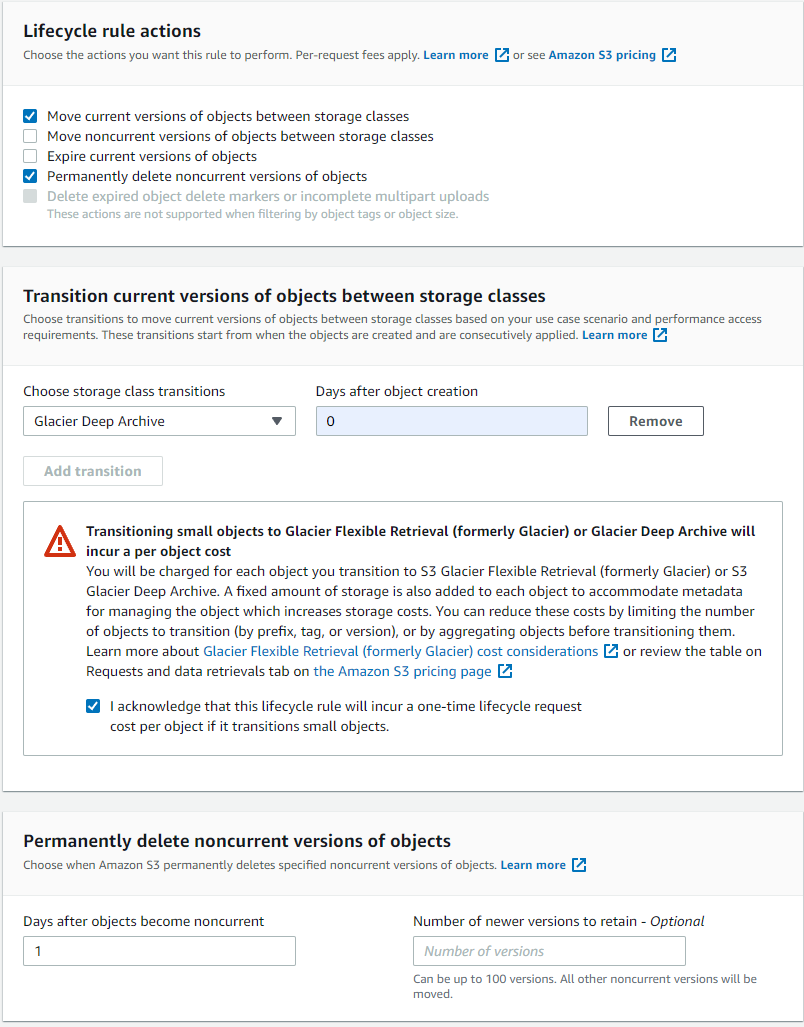
Check "Move current version of objects between storage classes" and "Permanently delete noncurrent versions of objects". Set the transition timeline to 0 and 1 days respectively.
Click Create rule.
Now we need to configure the bucket for Cross-origin resource sharing (CORS). Click on the bucket again and click the Permission tab.
Click Edit and paste in the following, replacing the AllowedOrigins with the host for your Tator deployment:
[
  {
    "AllowedHeaders": ["*"],
    "AllowedMethods": ["PUT", "POST", "GET", "HEAD"],
    "AllowedOrigins": ["https://cloud.tator.io"],
    "ExposeHeaders": ["ETag"]
  }
]
- Click Save changes.
Your bucket is now ready to use with your project.
Create and configure an IAM account on AWS
Now we will configure an IAM account for use with the bucket. We will grant minimal privileges to the account that are needed by Tator to interact with the bucket.
- From the AWS console, go to Services > IAM and click Policies.
- Click the Create policy button.
- Click the JSON tab and paste in the following policy, replacing my-tator-bucket with the name of your bucket:
{
  "Version": "2012-10-17",
  "Statement": [
    {
      "Sid": "AllowListBucket",
      "Effect": "Allow",
      "Action": "s3:ListBucket",
      "Resource": "arn:aws:s3:::my-tator-bucket"
    },
    {
      "Sid": "AllowObjectEditing",
      "Effect": "Allow",
      "Action": [
        "s3:PutObject",
        "s3:GetObject",
        "s3:DeleteObject",
        "s3:RestoreObject",
        "s3:PutObjectTagging",
        "s3:GetObjectTagging",
        "s3:DeleteObjectTagging"
      ],
      "Resource": "arn:aws:s3:::my-tator-bucket/*"
    }
  ]
}
Click Next: Tags
Click Next: Review
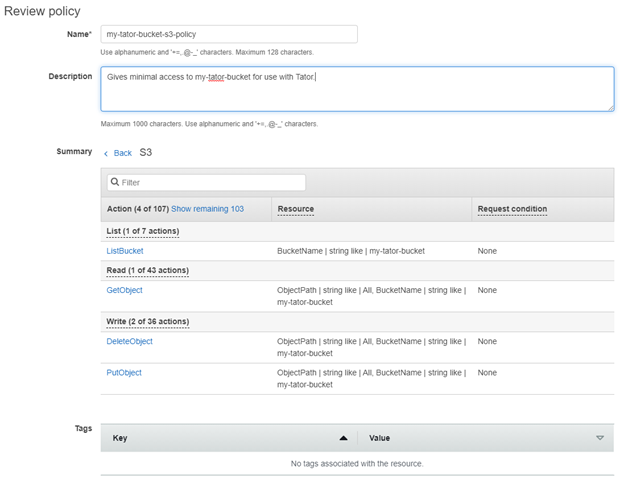
Give the policy a name and description.
Click Create policy.
Return to the IAM console at Services > IAM and click Users.
Click the Add user button.
Give the user a name and select Programmatic access.
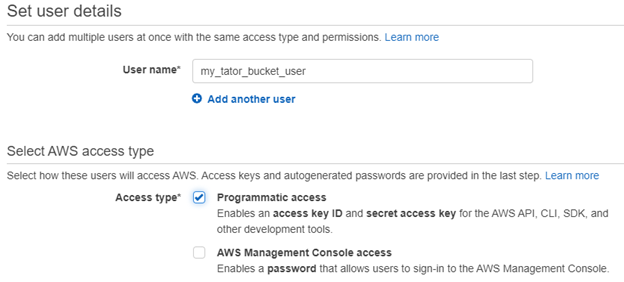
Click Next: Permissions.
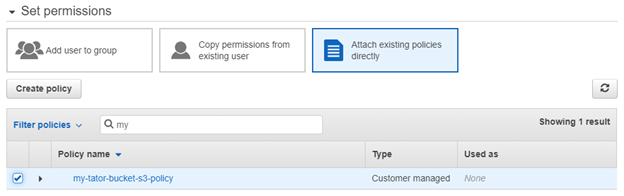
Click Attach existing policies directly.
Use the filter to find the policy you created and select it.
Click Next: Tags.
Click Next: Review.
Click Create user. Download the credentials that contain the access key and secret key.
The IAM account is now ready to use with Tator.
Create a Bucket and Project in Tator
We will use tator-py to register the bucket to our organization, then create a project that will use that bucket. You can also change the bucket property of an existing project.
Use django shell to create a Bucket object, replacing the host, token, bucket name, access key, secret key, region, and organization ID as appropriate:
config = {
        "aws_access_key_id": "YOUR_IAM_ACCESS_KEY",
        "aws_secret_access_key": "YOUR_IAM_SECRET_KEY",
        "endpoint_url": "https://my-tator-bucket.s3-us-east-2.amazonaws.com",
        "region_name": "us-east-2",
    }
b=Bucket.objects.create(organization=Organization.objects.get(pk=ORG_ID), name=BUCKET-NAME, config=config, store_type=ObjectStore.AWS, archive_sc='STANDARD')
Use the bucket ID to create a project:
p=Project.objects.get(pk=Foo)
p.bucket = b
p.save()
The project is now ready to use.