
In this blog post, we will cover how to install Tator on a GCP VM. The main trick is updating the domain to the virtual machine's public IP address after running the install script. This is necessary because by default the install script will discover the internal IP address only, and use that IP address for the load balancer, Kubernetes API server, and domain name. For the most part we simply need to run the install script and make one change to the Helm config file, but we will also cover VM setup in the GCP console.
Set up the GCP VM
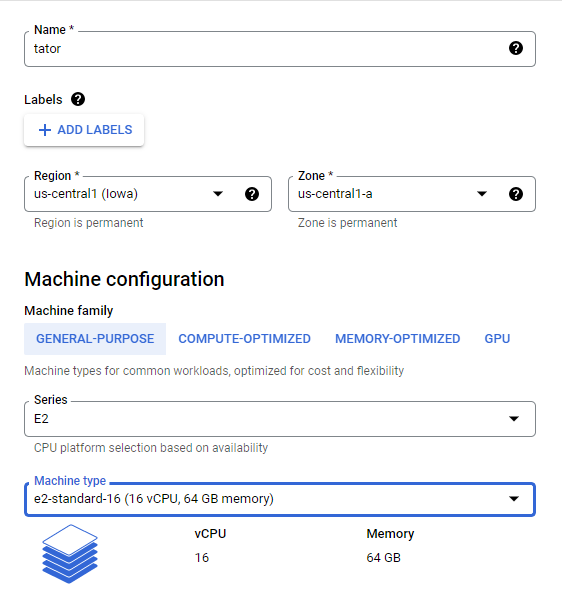
Start with creating a new VM. Give it a name, and select an e2-standard-16. This will give extra compute power so the VM can handle a modest number of transcodes and administrative services like logging and metrics.
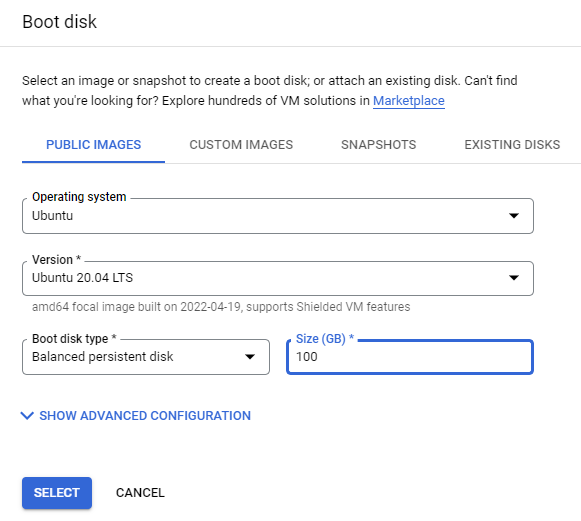
Change the Boot disk setting to use Ubuntu 20.04 LTS and set the size to 100GB or more, depending on how much data you want to upload.
Enable HTTP and HTTPS traffic in the firewall.

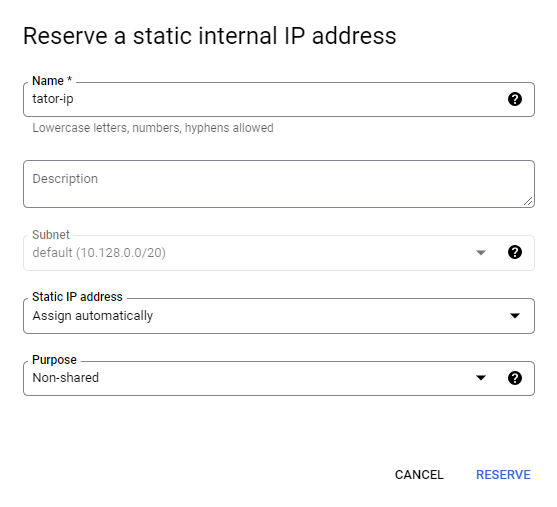
Reserve a static internal IP address clicking on Advanced options > Networking > Primary internal IP > CREATE IP ADDRESS.
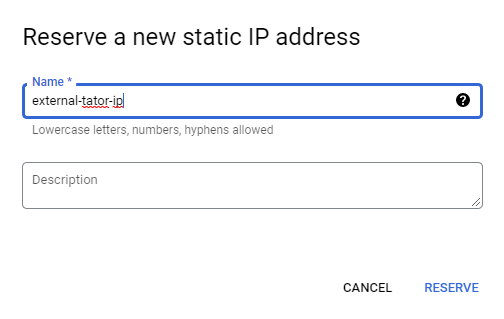
Also reserve a static external IP address by clicking Advanced options > Networking > External IPv4 address > CREATE IP ADDRESS.
Now create the VM by clicking Done and Create.
The VM will spin up. Once it is ready connect to it with SSH (either through the browser or your own client) and you are ready to install Tator. Make a note of the internal and external IP addresses. In this example the VM entry looks like this:

Install Tator
In the SSH session, clone tator and install it using the install script:
git clone --recurse-submodules -b stable https://github.com/cvisionai/tator
cd tator
./install.sh
After several minutes you will see the following message:
Installation completed successfully!
Open a browser (must be Chrome or Edge) to http://10.128.0.2 and enter credentials:
username: admin
password: admin
If this installation is accessible by others please change your password!
The address in the message is not reachable from the internet, so we need to take one more step to expose Tator to the internet.
Access Tator from the internet
Open the Helm configuration file at helm/tator/values.yaml and set the domain field to the external IP address.
# This can be a domain that points to a LAN IP address if you
# are accessing the site from another machine's browser or you
# are installing Tator in a VM.
domain: &domain 35.192.115.169
Now apply the changes:
make cluster-update
You can now access the deployment at http://YOUR_PUBLIC_IP.
You will not be able to play videos until you set up a domain and enable HTTPS. This is because of the WebCodecs API requiring a secure context.