Advanced localization filters
The localization analytics view allows for advanced filtering based on built-in and user-defined attributes. Filters may be applied to localizations directly, or to media containing the localizations. An arbitrary number of filters may be applied, which amounts to a boolean "AND" operation over all filters.
This tutorial will explain how to use the advanced filtering interface in the localization analytics view. To start, you need to enter the localization analytics view for a project containing localizations.
Apply a localization filter
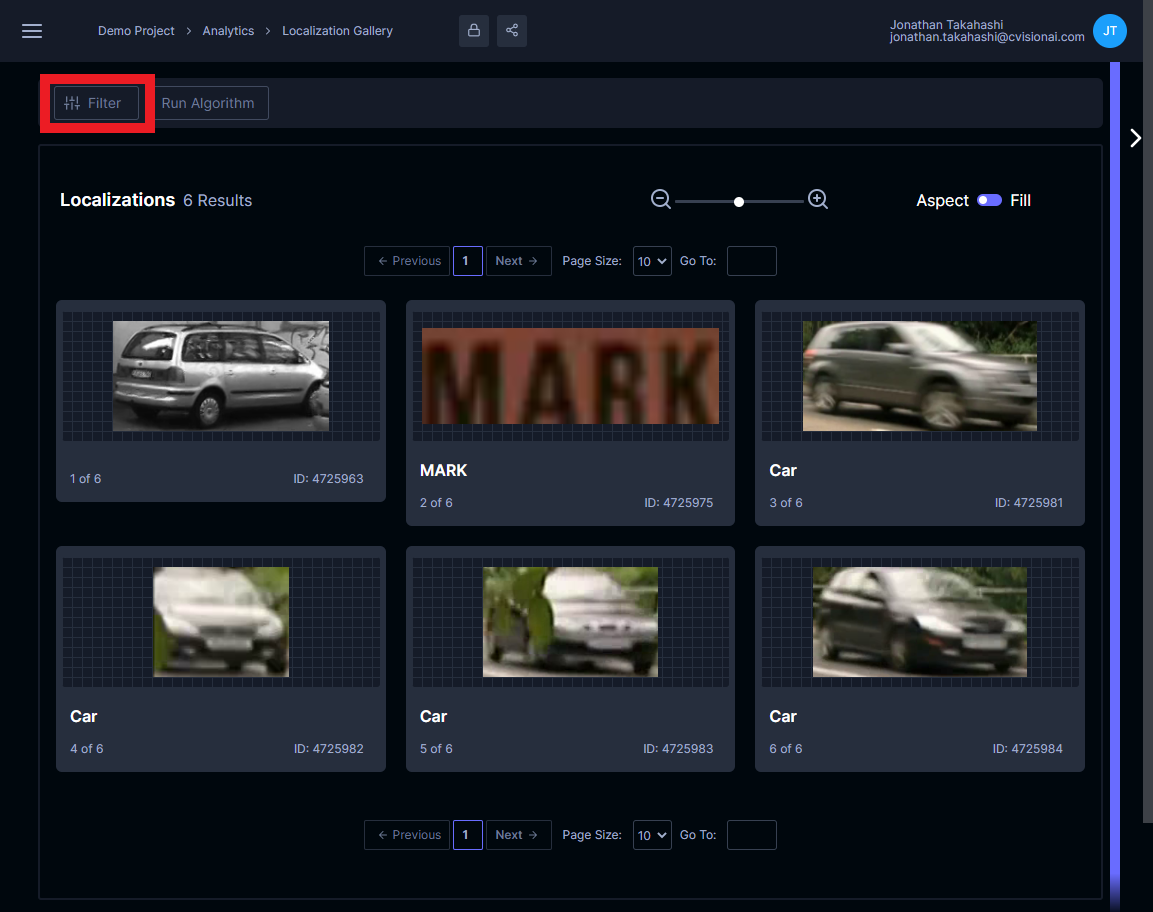
Click the Filter button to expand the filtering interface.
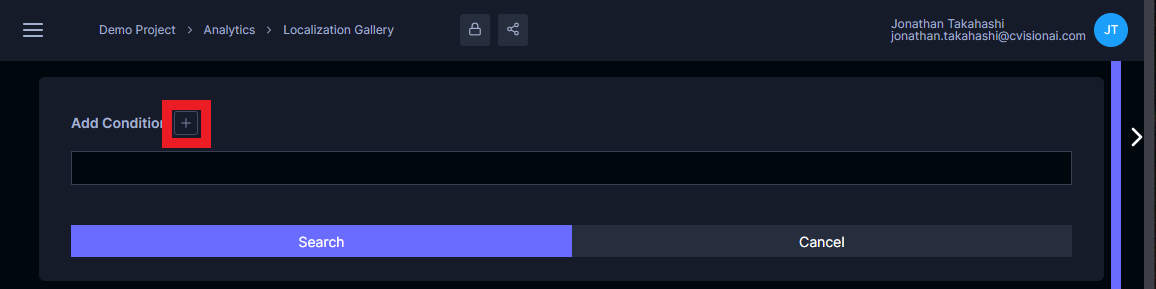
To add a filter, click the + button next to "Add Condition".
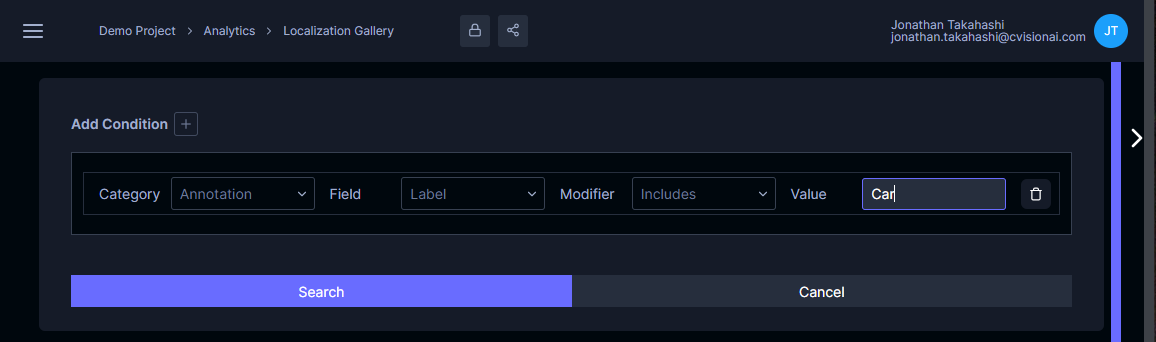
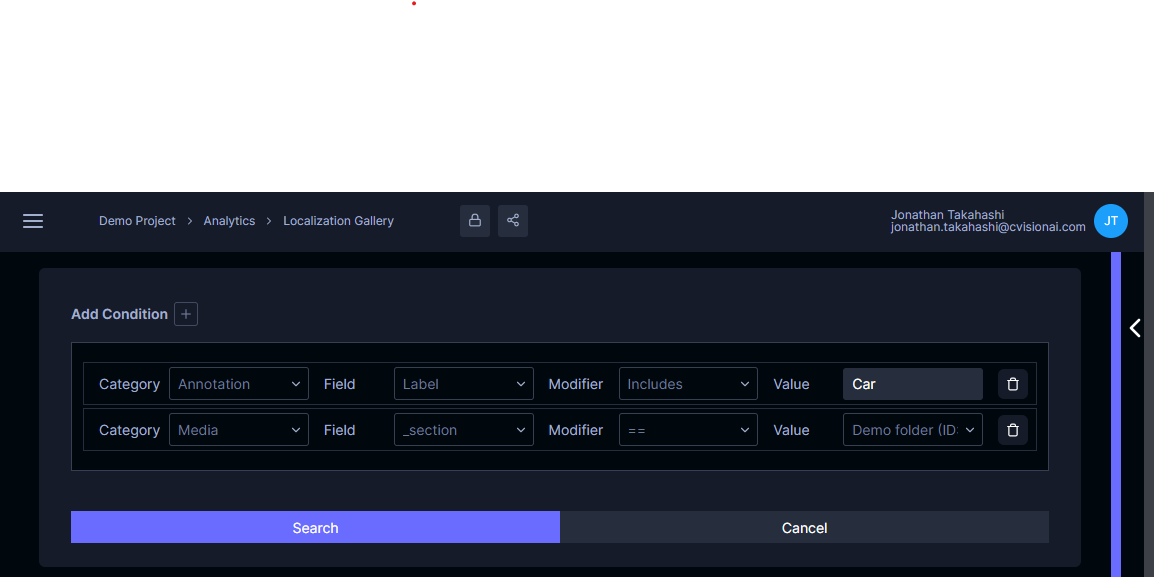
Select Annotation for "Category", then select an attribute to filter on for "Field". For string and enumeration attributes, the modifier can be an exact match (==) or a partial match (Includes). Numerical attributes can be filtered according to ==, <, >, >=, or <= operators. Set a value you would like to search for "Value".
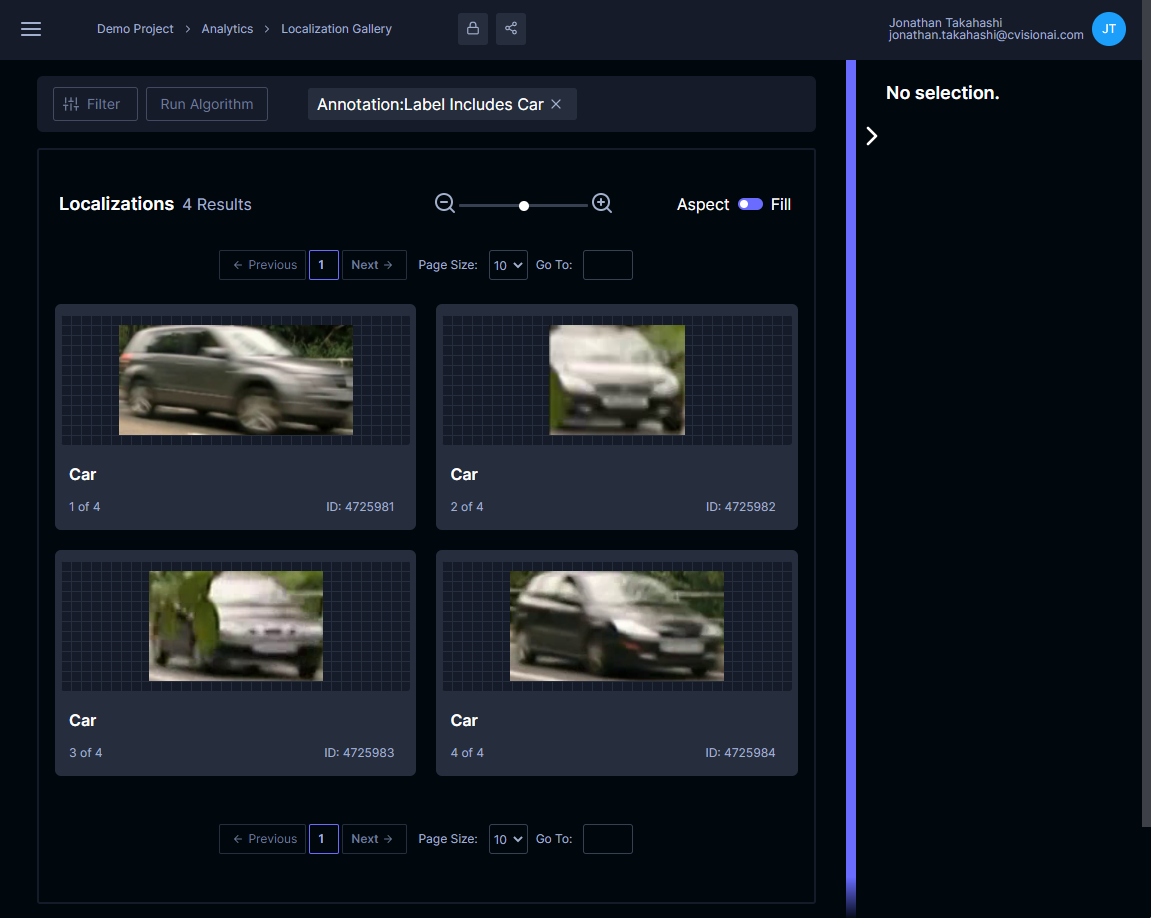
Now click Search. The displayed localizations will update according to the filter.
Apply a media filter
Now we will filter on media containing the localizations. Add another condition with the + button, and select Media for "Category". Set values for "Field", "Modifier", and "Value" according to how you want to filter parent media. The example below filters on the built-in _section attribute, which narrows results to a specific media folder.
Click the Search button again. Now the results will update with localizations that are contained by media that passes the media filter and that also pass the localization filter applied in the previous step.
Clear filters
When a filter is applied, a pill will be displayed for each filter. Clear the filters by clicking the x button on the pills.
![]()
The results will be updated to display all localizations within the project.