Hosted templates
New in Tator 1.3.
Hosted templates provide a way to register applets in Tator that are regularly updated and/or require configuration on a per-project basis. In this tutorial, we will demonstrate how to register a hosted template in a private GitHub repo, then use it in Tator with template parameters to customize it in an applet.
Hosted template overview
Hosted templates include a name, URL, headers, and template parameters. Hosted templates are registered at the organization level, then used in algorithm or applet registrations at the project level. The syntax for hosted templates is Jinja2. When an algorithm or applet using a hosted template is accessed via a GET on /rest/Algorithm/<id> or /rest/Applet/<id> the Tator backend will fetch the template contents using a GET on the hosted template URL with the supplied headers. The contents will then be rendered using the supplied template parameters. Both headers and templates can be specified at the algorithm and applet levels as well as the hosted template level, and if there is an overlap in parameter names the values specified at the algorithm/applet level take precedence.
In this tutorial we will demonstrate these concepts using a very simple applet hosted in a private GitHub repository. The template contents are shown below:
<!DOCTYPE html>
<html>
<body>
<p style="color: white;">{{ message }}</p>
</body>
</html>
The template simply displays the value of a single parameter message that can be set to whatever we need.
Create a personal access token (PAT) in GitHub
Hosted templates use simple URLs that can be accessed via an HTTP GET request with supplied headers. To make a file accessible from a private GitHub repository, we need to generate a personal access token (PAT). You can do this by accessing Settings > Developer Settings > Personal Access Tokens > Fine-grained tokens > Generate New Token under your GitHub profile menu. Select a specific repository.
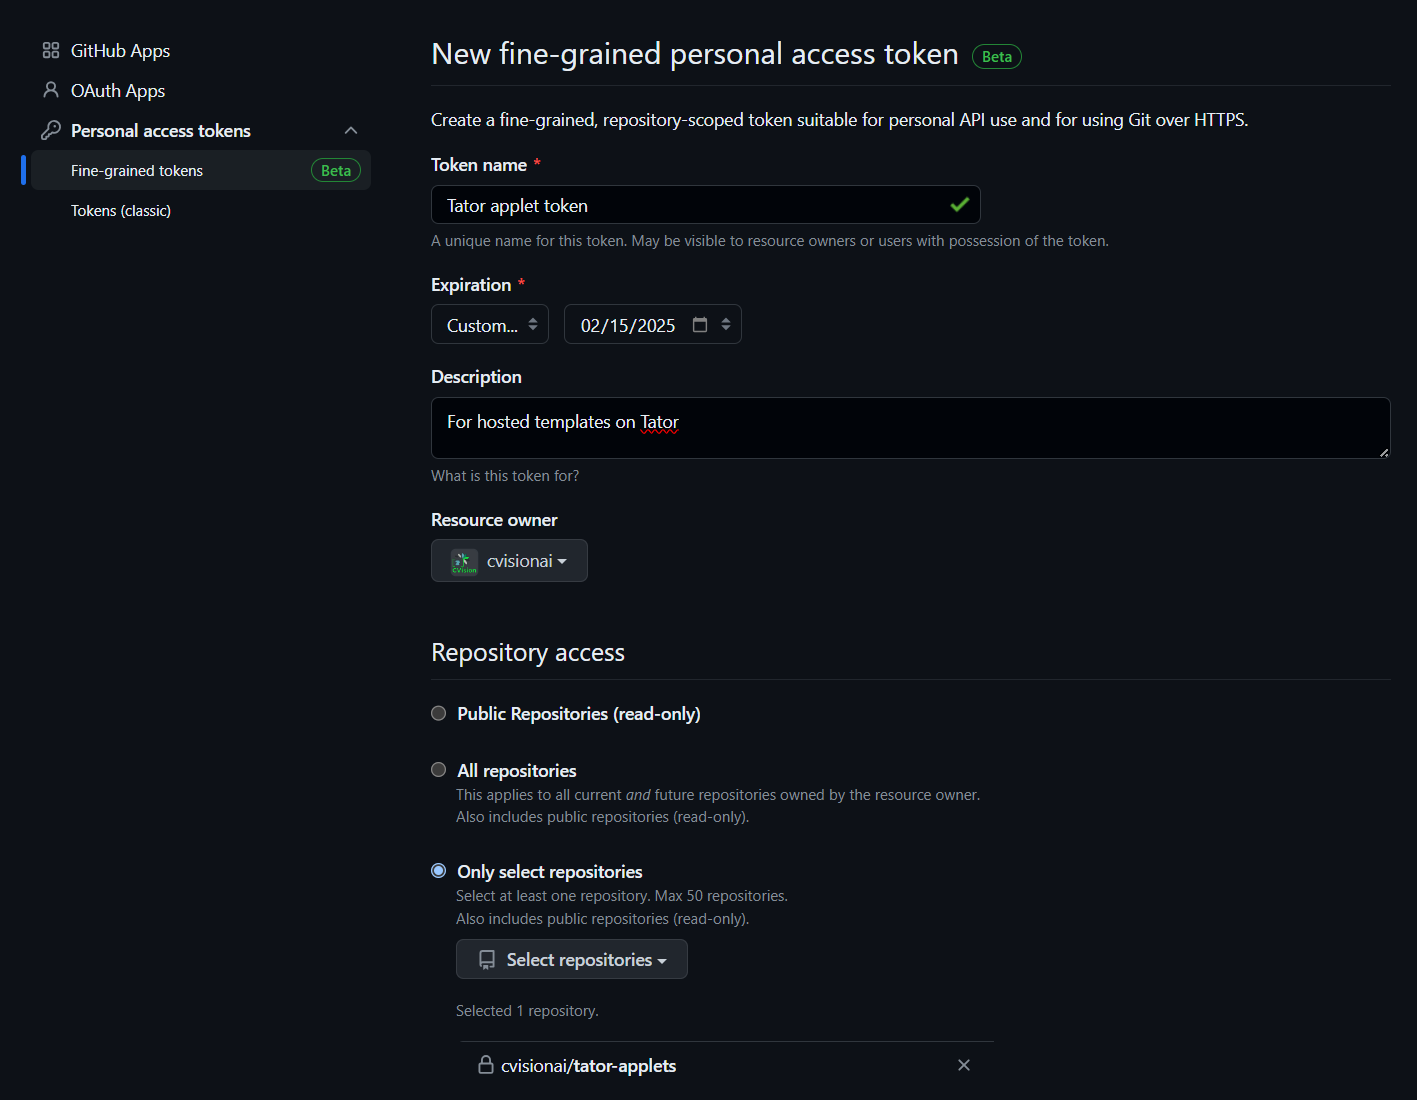
Under Permissions > Repository permissions enable Read-only under Contents.

Click Generate token and copy the token.
Register the hosted template
Hosted templates are scoped to organizations. Go to Organizations under the main menu, then click on the organization that will own the template. Click + Add new under Hosted Templates in the left sidebar. Enter the name of the template, and the URL in the following format:
https://raw.githubusercontent.com/USERNAME/REPOSITORY/BRANCH/PATH/TO/FILE
Add a header with the name Authorization and value token YOUR_PAT. The header value must be prepended with the all-lowercase token. Define a value for the message template parameter, in this example we choose A is for Apple.
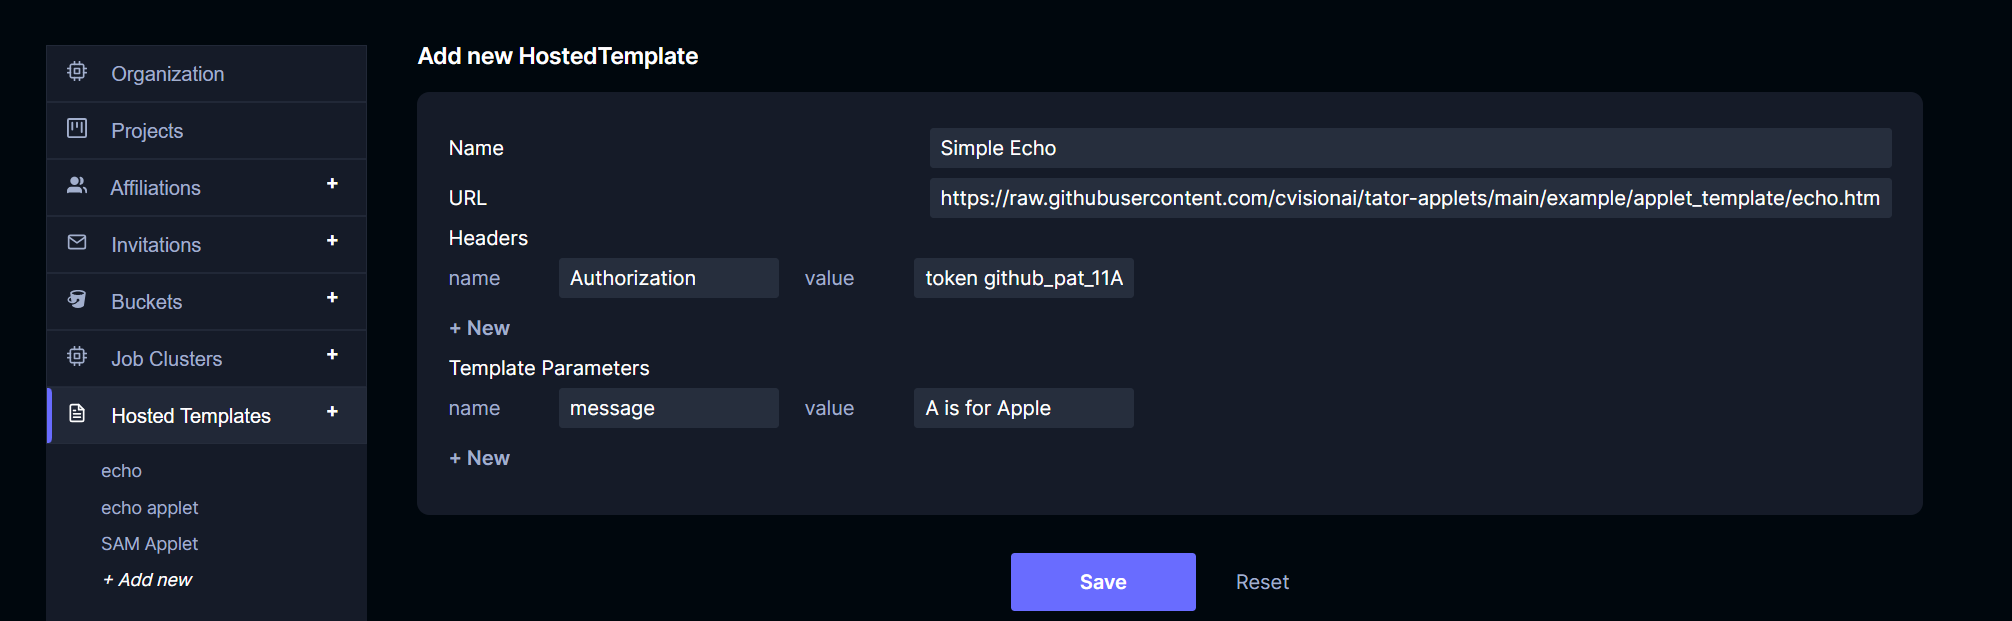
Click Save.
Register an applet using the hosted template
Hosted templates can be used by both algorithm and applet registrations. In the project settings for any project, click Applets > + Add new in the left sidebar. Set a name, description, leave HTML File blank, and under Hosted Template select the template we just registered.
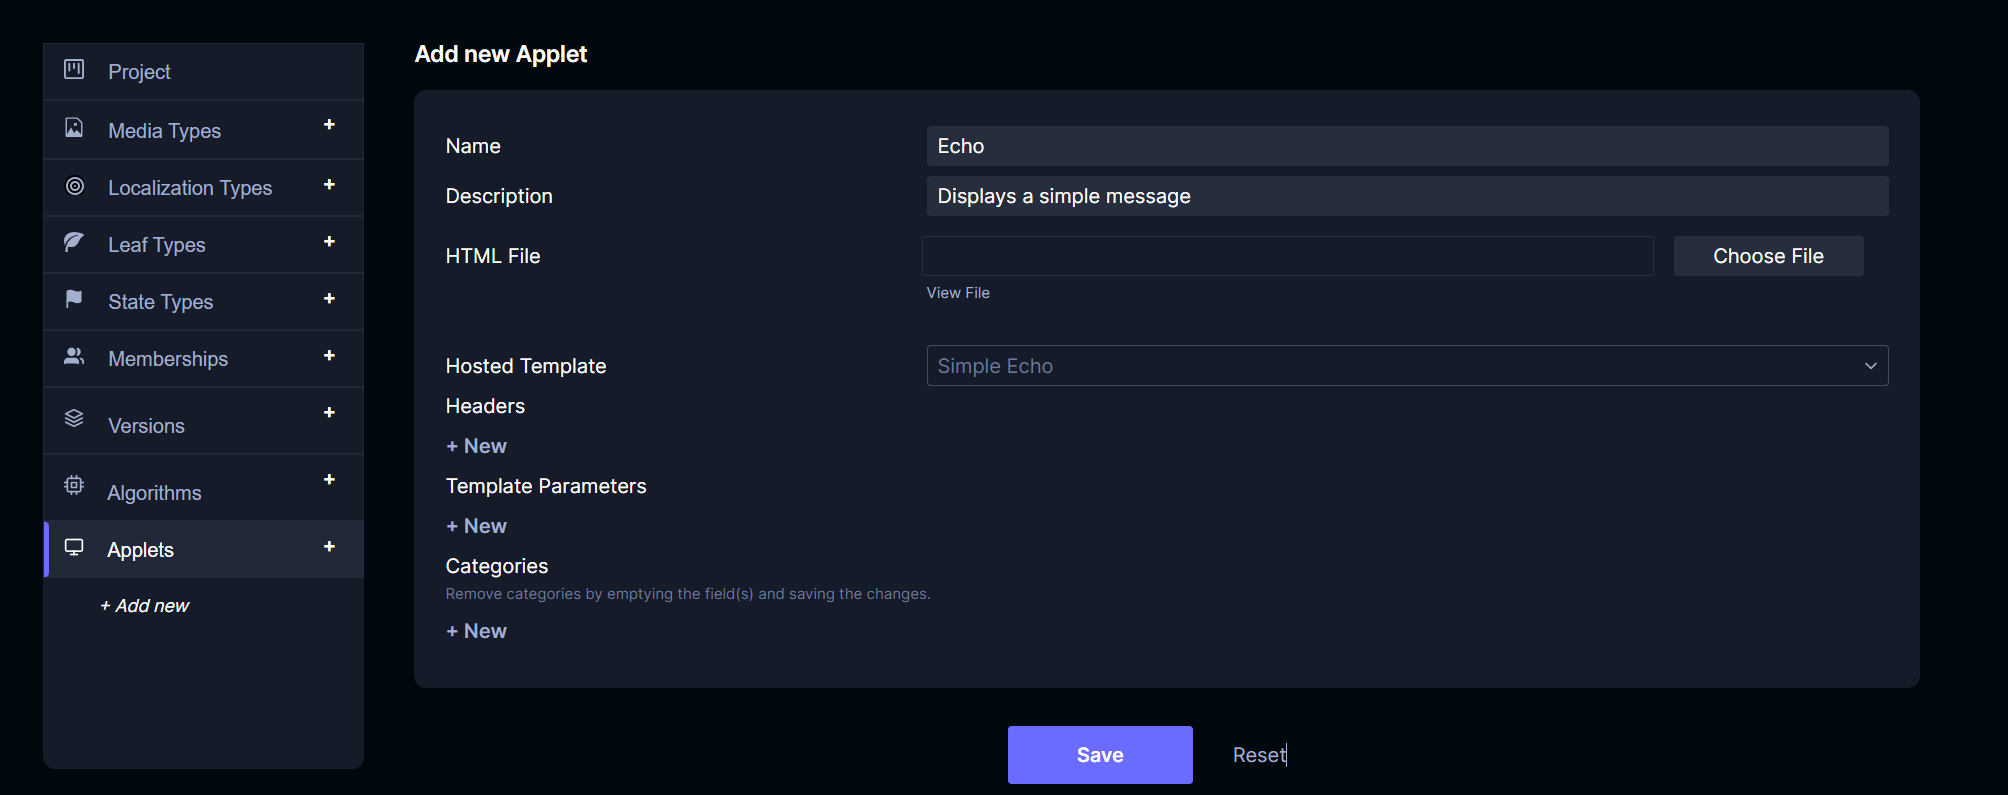
Click Save.
Open the applet
Now navigate to the project detail view and click Analytics > Dashboards and select the applet just registered. It will display the contents of the template parameter value set in the hosted template.

Update the message at the applet level
Suppose the hosted template contains default parameters, but you need to override them for a particular project. In that case, you can set the template parameters at the applet level. Navigate back to project settings and select the registered applet. Add a template parameter for message and set it to something different. In this example we choose B is for Banana.
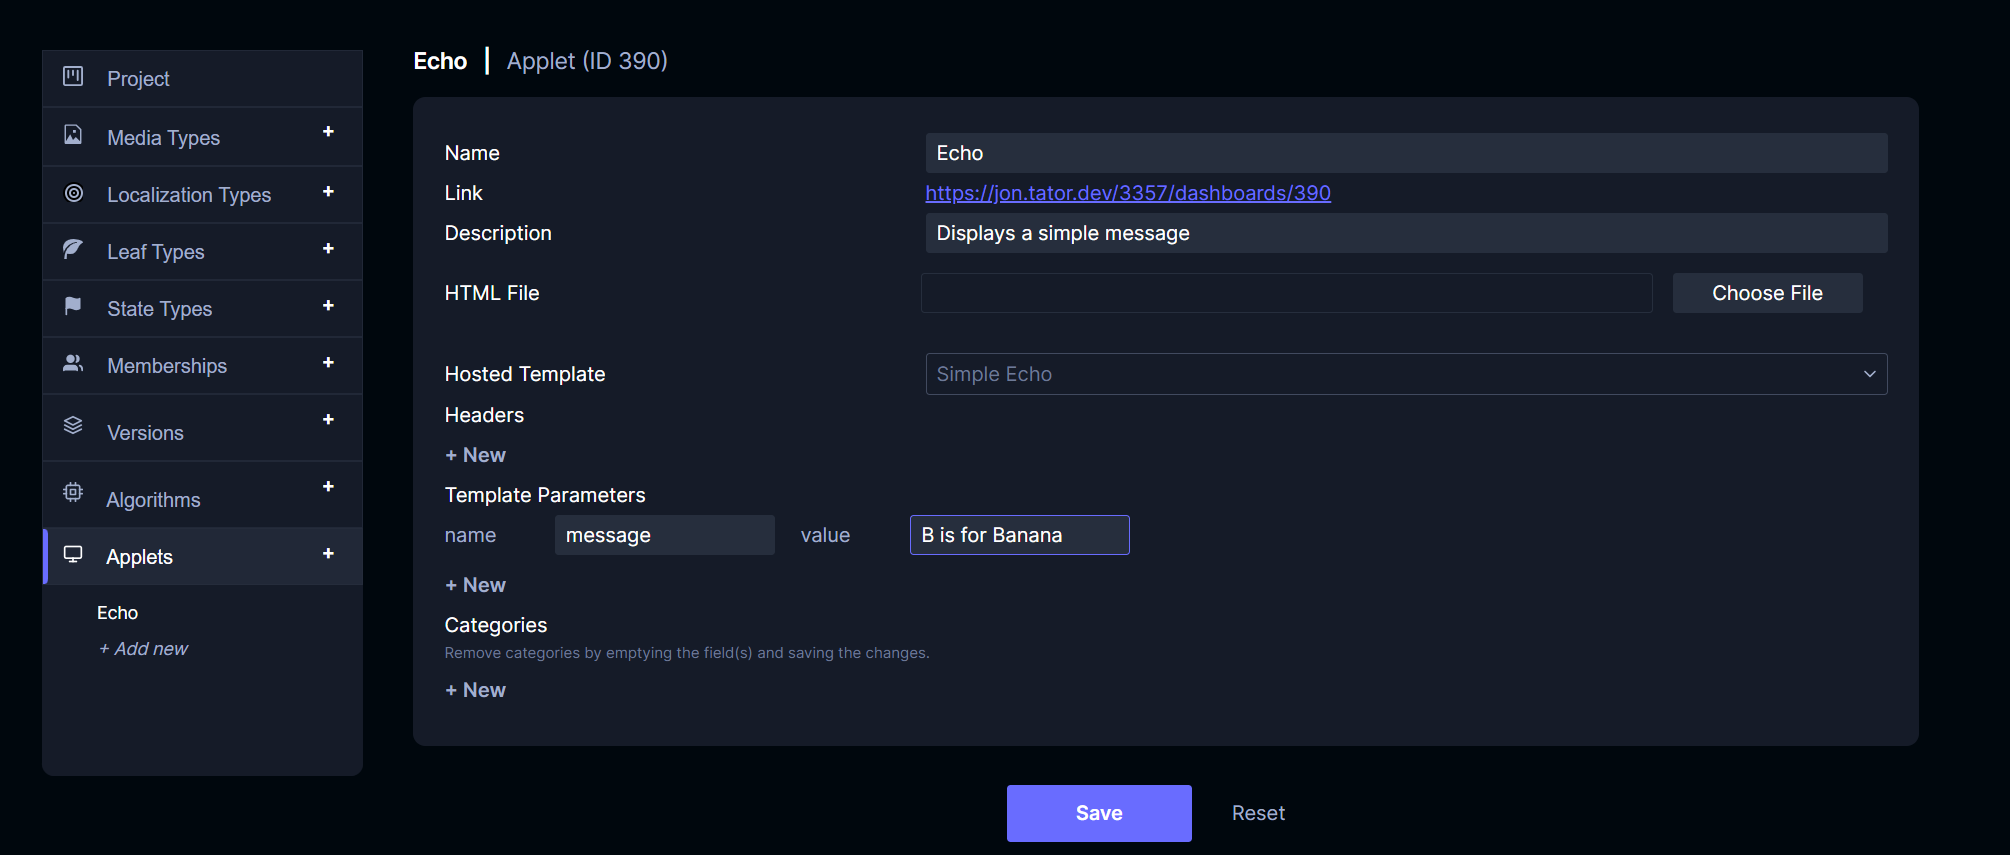
Click Save.
Open the applet again
Navigate to the applet again, it will now display the updated message.
