Create a Project
This tutorial will show you how to create a project using the web interface. The web interface provides a few preset configurations for projects, all of which can be further configured using the project settings page.
Create a project
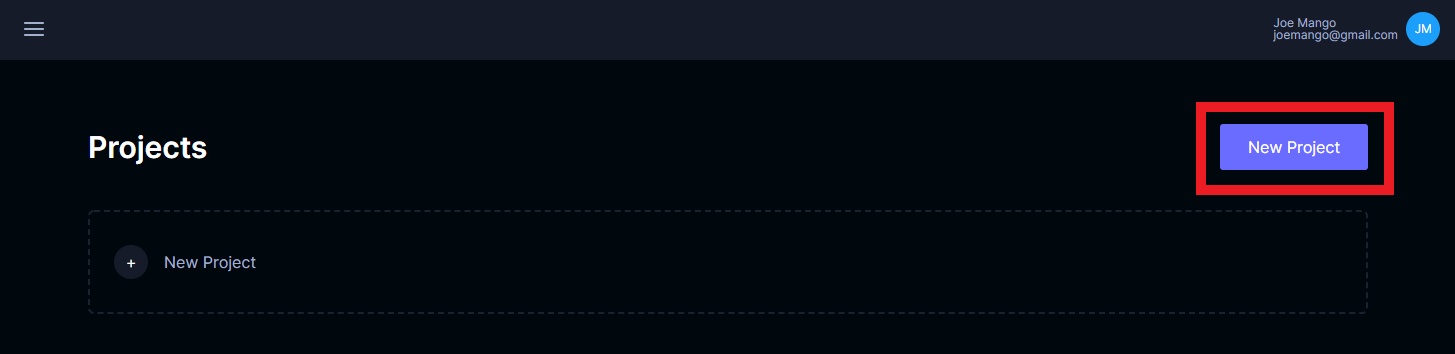
When you first log in, you will see the project list view. Click the New Project button.
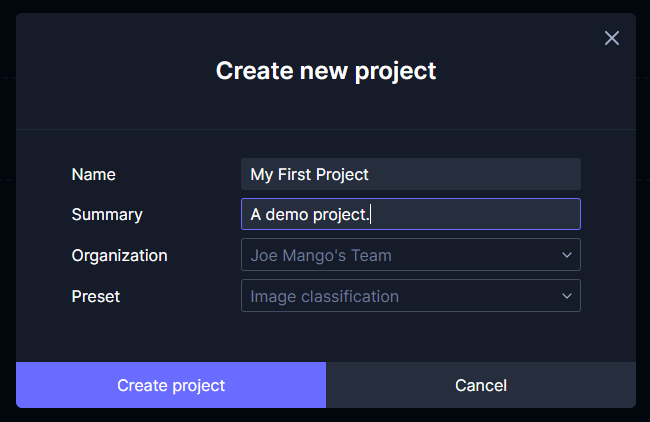
A modal dialog will be displayed. Enter the project name, optionally a project summary, and select an organizational owner. An organization is created automatically when a user is created, unless they were invited directly to an organization. The preset can take any of the following values:
- Image classification: Creates a project with an image type and a label that can be applied to each image.
- Object detection: Creates a project with an image and video type and a box localization type with a label attribute.
- Multi-object tracking: Creates a project with a video type, a box localization type, and a track type with a label attribute.
- Activity recognition: Creates a project with a video type and a frame-associated state type with a boolean attribute.
- None (no preset): Creates a project with no pre-configured metadata.
Click the Create project button. A notification dialog will be displayed letting you know if the project creation succeeded.
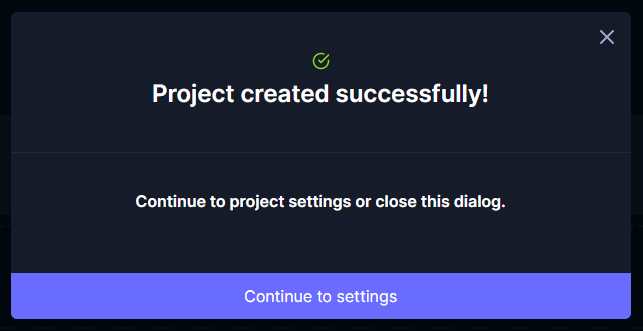
Click the Continue to settings button. This will take you to the project settings, where the project can be further configured.